Preliminary configuration of the ECC Server
Run the ECC Server Configuration Wizard
The ECC Server Configuration Wizard allows you to view or modify the ECC Server's primary configuration settings.
Note: The ECC Server service will be restarted at the end of this Wizard if you choose to save your changes.
Additional configuration settings can be set manually; for details see Manually edit the server.conf file.
Run the ECC Server Configuration Wizard by installing or upgrading ECC Server, or by running the ECC Server Configuration Wizard desktop shortcut. After a short time, the ECC Server Configuration Wizard will appear:
At the Welcome screen, click Next to advance to the Installation Options screen.
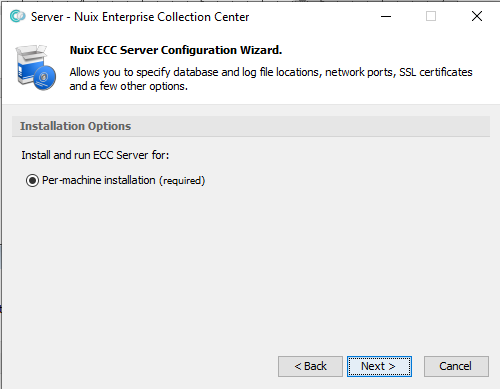
If prompted to Run as Administrator click Run as Administrator. This will re-run the ECC Server Configuration Wizard after prompting for your password. Click Next to show the Installation Locations screen.

You can accept the default Database Location and Logs Location, as shown above. Or place the database or logs in a different folder or volume, by clicking the Advanced option, then clicking Enable editing the Location fields.
Note: The Database folder typically requires less than 10 MB of disk space initially; however, this folder can grow to exceed 5 GB due to activity logging. Be sure the selected volume has the needed capacity and performance.
Note: When upgrading an existing installation of ECC Server, do not change the Database Location via the Server Configuration Wizard. If you need to relocate the Database Location then complete or cancel the Configuration Wizard before manually relocating the ECC Server database.
Click Next to advance to the next screen.
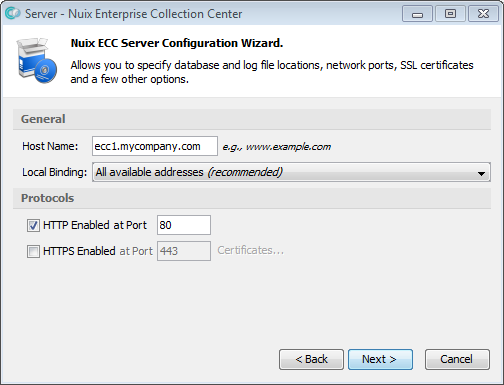
At the General screen, specify the following configuration items:
| Item |
Description |
| Host name or IP |
Enter the fully qualified name of your ECC Server, for example, ecc1.mycompany.com. This setting must correspond to the URL used by your server and must be ping-able from this computer and other computers on your network. If using HTTPS, this host name must correspond to the host name embedded within your SSL certificate. |
| Note: An IP address can be used instead of a host name; however, IP addresses are not supported by SSL certificates for HTTPS connections*. Also, IP addresses may change. The server should be assigned a static local IP address to prevent this possibility. * Even if a self-signed SSL certificate can be generated using an IP address, the web browser may show a persistent warning when browsing to the site. |
|
| Local binding |
Optionally specify the IP addresses or network interfaces which the ECC Server will connect through. The default value All available addresses is usually fine; however, if your server is multi-homed (contains more than one connected network adapter), it is best to select a specific IP address associated with a particular network adapter. |
| HTTP enabled at port |
Check this option to enable HTTP communication with the ECC Server. Accept the default port of 8080 or specify a different port you prefer (or if TCP port 8080 is already being used by another application). Make note of this port number, as you will need it later. |
| Note: You must enable an HTTP and/or an HTTPS port to permit computers running ECC Client to communicate with the ECC Server. ECC Admin Console computers also use this port. These programs use built-in encryption when communicating with the ECC Server – even when using HTTP. |
|
| HTTPS enabled at port |
Check this option to enable HTTPS communication with the ECC Server. Accept the default port of 8443 or specify a different port you prefer (or if TCP port 8443 is already being used by another application). Make note of this port number, as you will need it later. |
| Note: Enabling HTTPS is strongly recommended if: You will enable the ECC high-level API for integrating with Nuix Adaptive Security, Nuix Workstation, or other products. Or you must configure this ECC Server as a public-facing server. When HTTPS is selected any web browser session over HTTPS with the ECC Server is also encrypted, as are REST API communications between ECC Server and other applications. |
|
| Tip: If you need to locate the ECC Server in the Cloud or anywhere on the internet where it is publicly accessible, please contact Nuix Support for suggested approaches. |
|
| Certificates |
Click the Certificates option to configure an SSL certificate. The previous option HTTPS Enabled must be selected. This option provides an entry form for registering the PEM-encoded contents of your server's private key, public SSL certificate, and any intermediate certificates. A link is provided to generate a self-signed SSL certificate and accompanying private key. If (1) HTTPS Enabled is selected, and (2) the Certificates option is skipped, and (3) no previous SSL certificate was ever configured for ECC Server, then a new self-signed SSL certificate and private key will be generated automatically when the Nuix ECC Server service is started at the end of the Server Configuration Wizard. |
Click Next to advance to the Confirmation screen.
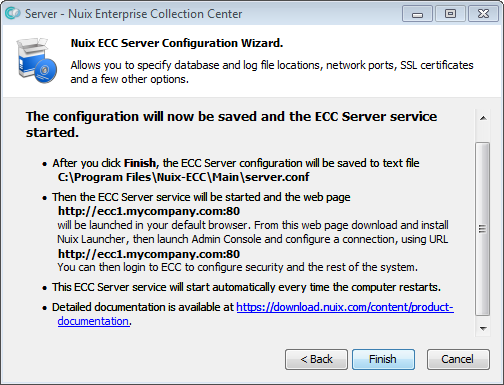
Write down the file path and the two URLs listed in the Confirmation screen (shown above). These details will be needed for future configuration steps, specifically:
The full path to the server's configuration file. This text file will be created once you click Finish.
The web address needed to launch ECC Admin Console from a Web browser. Admin Console is needed for configuring collection jobs and managing the ECC system.
The URL used by ECC Admin Console and ECC Client to communicate with the ECC Server. This URL begins with http:// or https:// and includes the TCP port number.
Note: If both HTTP and HTTPS were enabled, then the Confirmation screen will only show http URLs even though the https URLs are also valid.
Click Finish when ready to save your ECC Server configuration and start the ECC Server service or application.
Verify the Nuix ECC Server web page is responsive
Launch a web browser on the ECC Server, then browse to the web address provided at the end of the ECC Server installation, on the final page of the ECC Server Configuration Wizard. For example:
http://eccserver.mydomain.com:8080
where 8080 is the HTTP port you configured when ECC Server was installed. If instead you enabled HTTPS on port 443, use a web address such as:
https://eccserver.mydomain.com
Note: If the ECC Server lacks a graphical environment, launch a web browser from a different computer.
The ECC Server Web Page is displayed, as shown below:
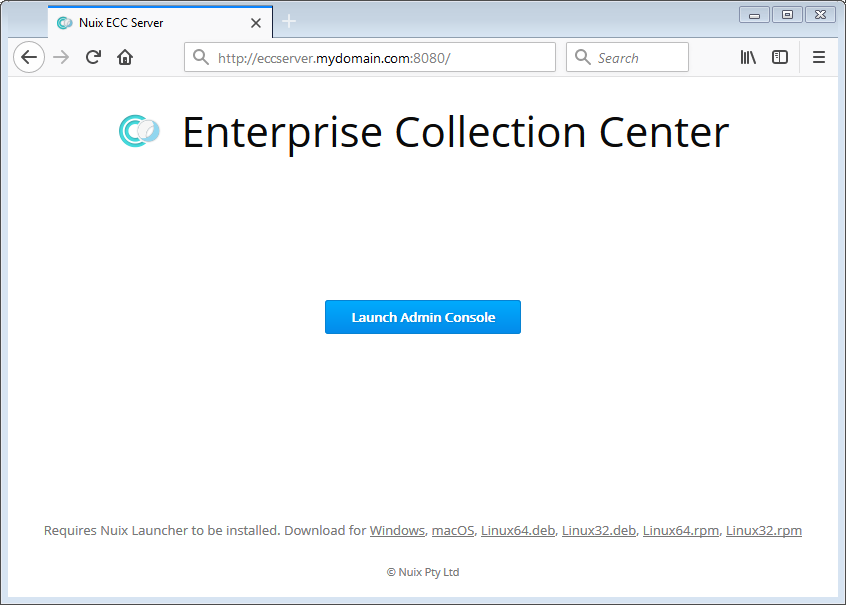
This web page indicates that the Nuix ECC Server service is running properly.
If the above web page does not appear, Check that the ECC Server Service is Running. If necessary, View or Edit Server Configuration Settings and restart the ECC Server service.
Tip: If you experience any difficulty connecting to ECC Server, please contact Nuix Technical Support for assistance.
Exit the web browser.
Check that the ECC Server service is running
You can confirm whether the ECC Server service is running by following the procedure to check the ECC Server Status.
If the ECC Server service is not started, you can restart it using the ECC Server Startup Procedure.
Note: If the ECC Server service fails to start, check the ECC Server service logs or the system event logs for any recent errors related to ECC Server. See topic Purging Old Log Files to locate the Server log files directory.
Tip: If you experience any difficulty starting the ECC Server or connecting to it, please contact Nuix Technical Support for assistance.
View or edit server configuration settings
You can Run the Nuix ECC Server Configuration Wizard at any time to review or change the primary configuration settings for the ECC Server.
Warning: If you complete the ECC Server Configuration Wizard by pressing the Finish button from the final Wizard screen, the ECC Server will immediately restart. If, instead, you cancel out of the Wizard then no ECC Server restart will occur, nor will any changes be saved to the server.conf file.
Alternately, you can view or modify the ECC Server configuration settings file. This file stores several settings that the Configuration Wizard cannot show. See the procedure Manually edit the server.conf file.
If you save changes to the ECC Server's configuration file, you must stop the ECC Server service, then restart it for your changes to take effect. See the ECC Server Shutdown Procedure and the ECC Server Startup Procedure. After restarting the service, you should once again Verify the Nuix ECC Server web page is responsive.
Set file/folder permissions on the ECC Server
On an ECC Server computer running Windows, permissions for certain folders must be edited to ensure only authorized users can access them.
To configure ECC Server file/folder permissions on Windows:
Stop the Windows service "Nuix ECC Server", from Control Panel > Administrative Tools > Services.
Run Windows Explorer or File Explorer on the ECC Server.
Navigate to the Nuix folder under the application data folder, typically located at:
C:\ProgramData\Nuix\ECC Server
Right-click the Nuix-ECC folder and select Properties, click the Security tab.
Click the Advanced option, then click Change Permissions (if shown).
Select Replace permission entries on all child objects.
If a permission entry for user group Everyone is present, select it and click the Remove option.
Verify that file/folder permissions are suitable for administrative users who will login to the ECC Server to configure ECC. If necessary, add or remove user accounts or user groups.
Note: The SYSTEM account and members of the local Administrators group should generally retain Full Control permissions. ECC Server does not require the local NETWORK SERVICE account to have any permissions to the Nuix-ECC folder.
Click OK again to save the new permissions to the entire Nuix-ECC folder branch (including subfolders). Acknowledge the warning, wait for the process to complete, then click OK repeatedly to close out of all file/folder permission dialogs.
Exit Windows Explorer.
Start the Windows service "Nuix ECC Server", from Control Panel > Administrative Tools > Services.
Additional server configuration
Additional configuration steps cannot be done until you launch ECC Administration Console and establish a connection to the ECC Server. Steps for launching Admin Console are presented in the next topic. Once you are able to run ECC Admin Console, proceed with topic Additional ECC Server Configuration.
Warning: The ECC Server is not secure until a password is established for the ECC user account 'Administrator'. Setting ECC user accounts and passwords is covered under Additional ECC Server Configuration.