Create and edit a dictionary
Add a new dictionary
Click the Dictionary button on the left navigation bar.
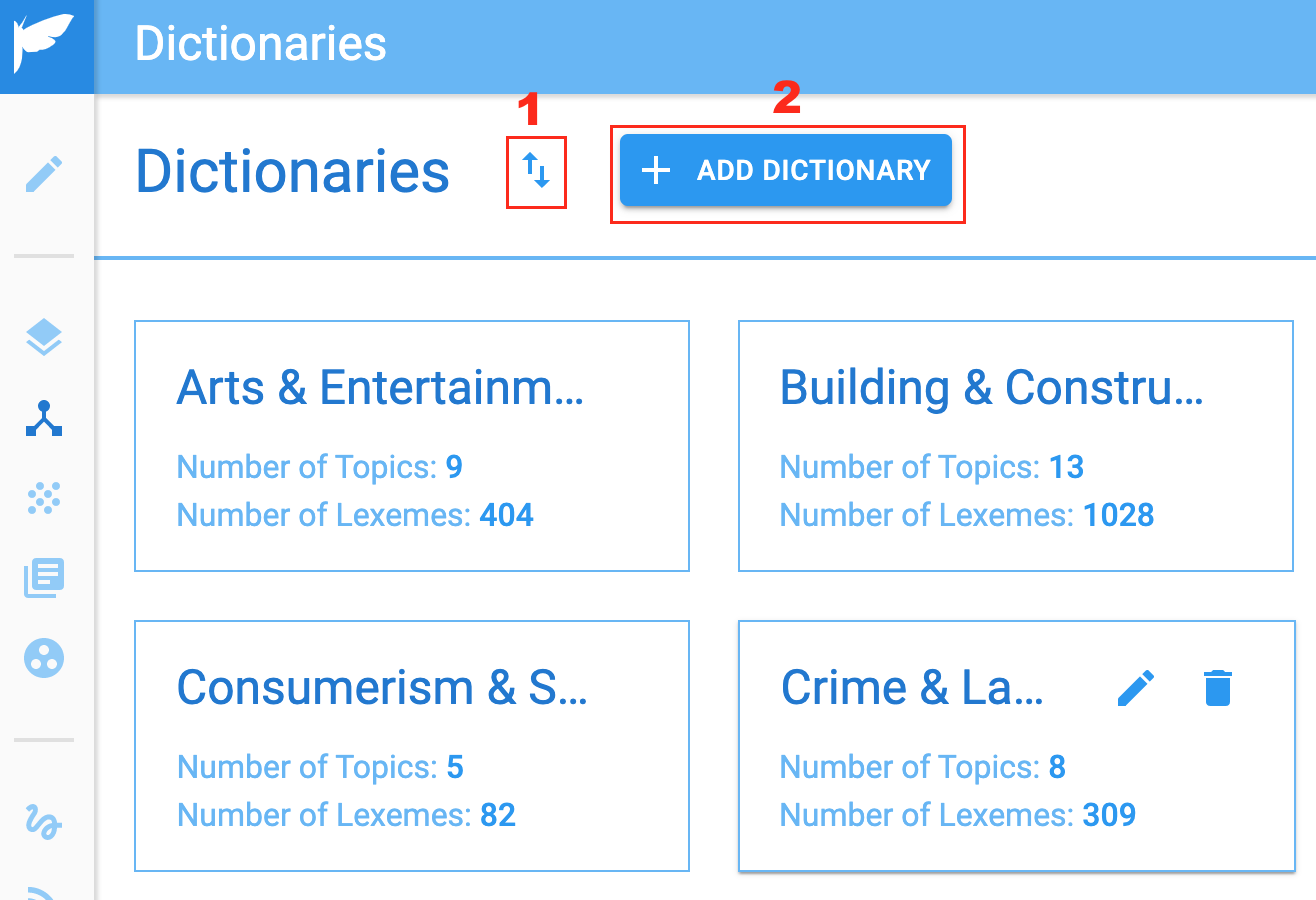
This button is used for exporting and importing the Dictionary. The dictionary data includes the topics, lexemes, and all validation data.
This button is used to add a new dictionary.
Note: When creating a dictionary keep in mind that the name cannot be changed later.
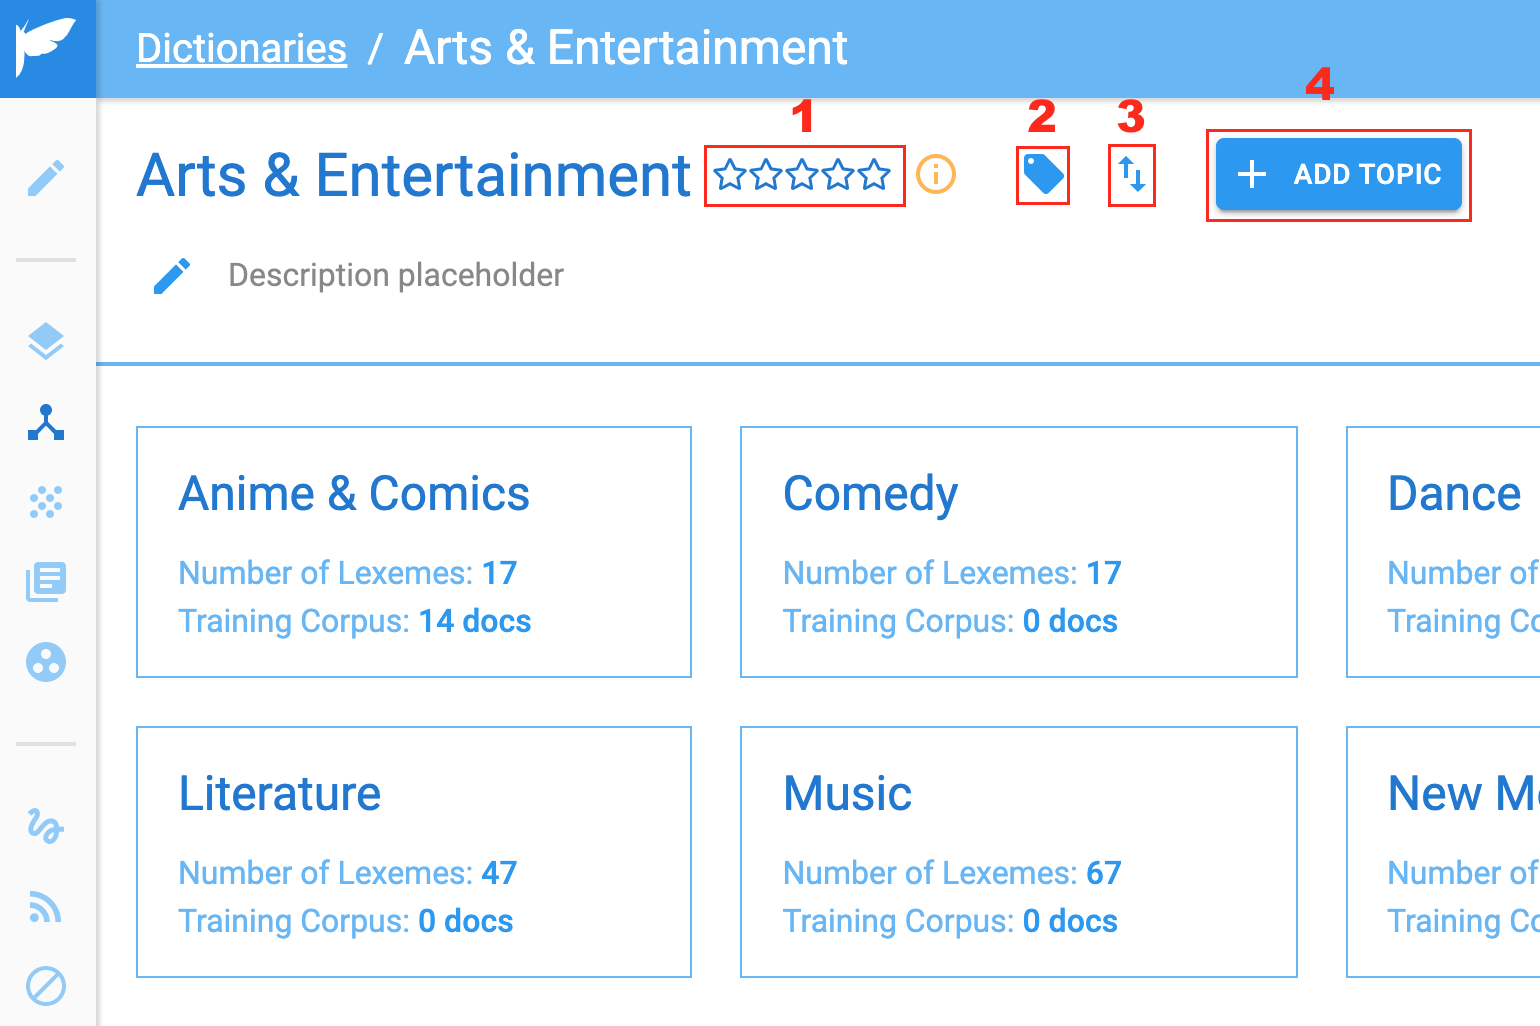
This is the score assigned to the model based on its performance in validation.
This button allows the user to add tags to the model being viewed.
This is another Import/Export button.
This allows the user to add a topic.
Add a new topic
As with the Dictionaries, Topic names cannot be changed after the creation.

| Number in Image | Description |
| 1 | This is the score assigned to the model based on its performance in the validation. |
| 2 | This button allows the user to add tags to the model being viewed. |
| 3 | This button updates the model using the Training Texts and allows the user to see the proximities of the documents. |
| 4 | This is a count of the Lexemes in the model. |
| 5 | This allows the user to add an individual lexeme. |
| 6 | This creates a .csv file with all the lexemes and aliases in the topic. |
| 7 | This allows users to upload a .csv file to add lexemes to the topic. |
| 8 | This exports all the topic training text in a .zip file. |
| 9 | This allows users to upload training documents to the model. |
Add a new lexeme
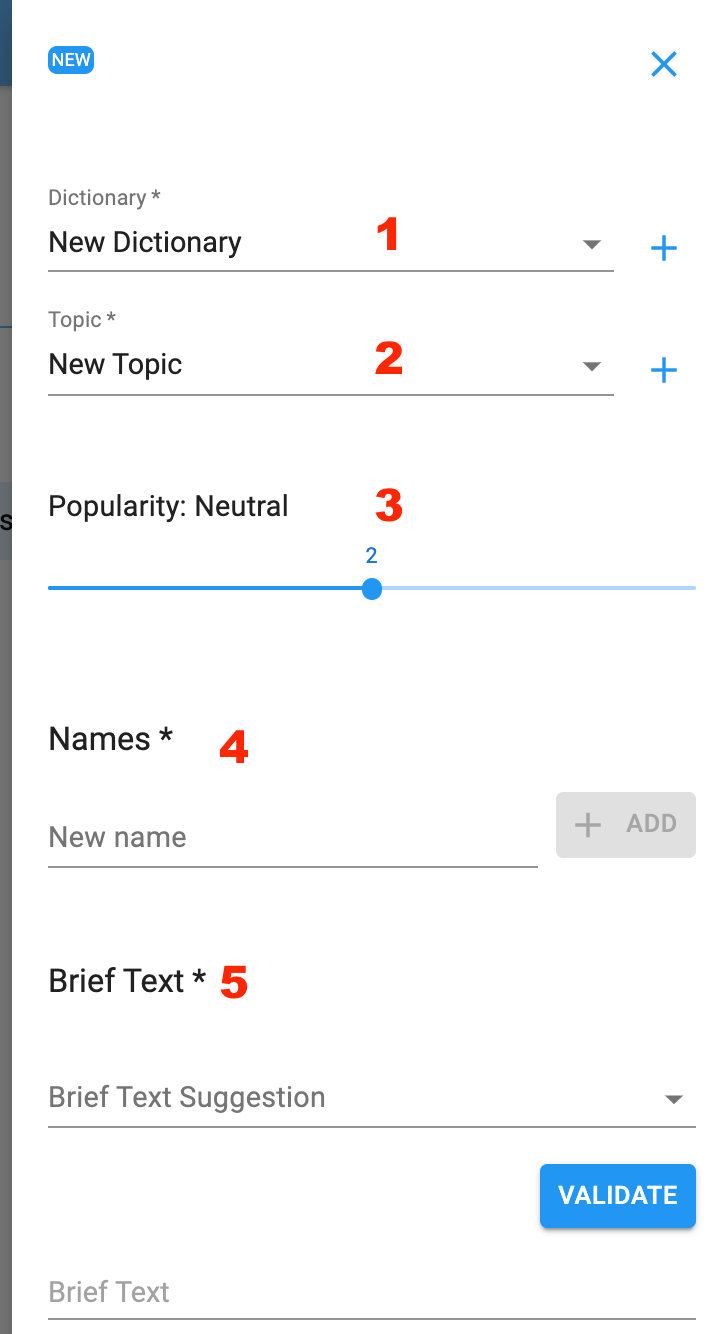
To add an individual Lexeme, a user can use the Add Lexeme button from the Topic view (or the Add Entity button in the Text Editor) which opens this screen on the left.
This allows users to select the dictionary for the Lexeme. If the user is creating a Lexeme from the Topic screen this will default to the Dictionary the Topic is being viewed in.
This allows users to select the Topic for the Lexeme. If the user is creating a Lexeme from the Topic screen this will default to the Topic being viewed.
The popularity affects the proximity increase to the Topic caused by the Lexeme being present in a text.
The Names field includes the Main Name and the Aliases. This allows one lexeme to have several strings which will cause a lexeme match. The user can select any name as the Main Name. Stop words cannot be Main Names or Aliases.
Brief Texts are pieces of texts which are used to create a text-based model to associate with the Lexeme. Brief texts must be at least 50 characters long and need to be “Validated” before the Lexeme can be created. The language used within brief texts also affects the proximities to the Dictionaries and Topics they are in. The user may use the Brief Text Suggestion feature but the suggestions from a website may not meet the requirements for Nuix NLP.
Once the brief text is validated the user is given information regarding the brief Text, as well as any lexemes which may be in the brief text.
Brief Text Word Quality shows the user whether the length of the brief text is too long or short
Brief Text Topic Quality shows the user whether this brief text is relevant to the Topic. This is influenced by the content of the brief texts within the topic’s other lexemes.
The stats page shows the user the high-value words within the brief text.
The Edit button allows the user to edit the brief texts.
Once the brief text is validated this button creates the lexeme, adding it to the topic.
Add lexemes using bulk upload
The most efficient method for adding lexemes to a topic is doing a bulk upload. This process involves creating a simple three-tab spreadsheet.
Create a CSV of lexemes
Open a new spreadsheet and save it as the topic name.
Within this sheet:
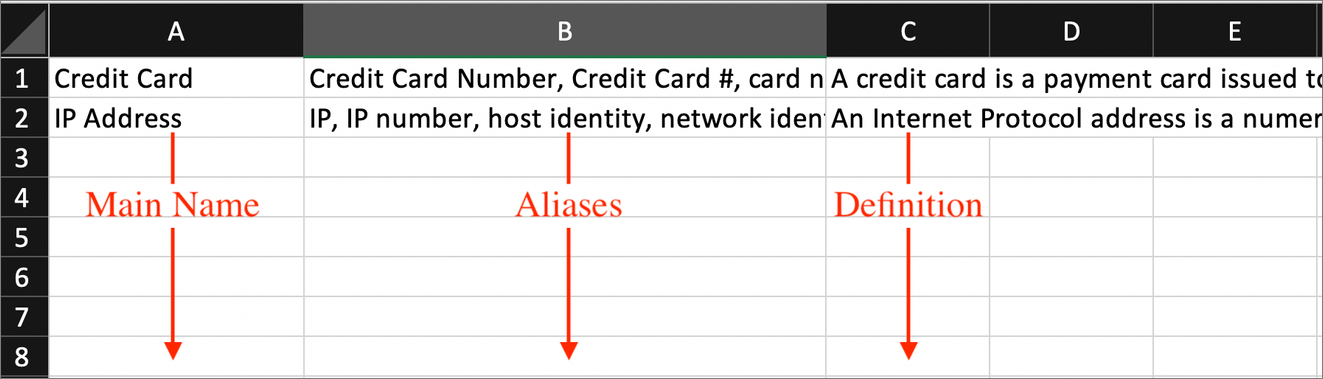
The first column will have the Main Name for the Lexemes you are adding.
The second column will have aliases for each Lexeme.
Aliases for a Lexeme are separated by a comma and a space.
The third column will contain the brief text of each Lexeme.
Example CSV:
When you have finished adding your lexemes, save the spreadsheet in the CSV file format ('export to' or 'Save As' a .csv file). Make sure your CSV file only contains three columns and contains no column headers. If the CSV is not formatted properly an error is thrown during the import process.