Create Nuix Adaptive Security CSR from IIS
This guide assumes that there is a CA that can sign the .csr that is created. For more details on how to do this view the Creating a new self-signed CA Certificate section.
Use IIS 10 to Create Your CSR
To use IIS 10 to create your CSR:
In the Windows start menu, type Internet Information Services (IIS) Manager and open it.
In Internet Information Services (IIS) Manager, in the Connections menu tree (left pane), locate and click the server name.
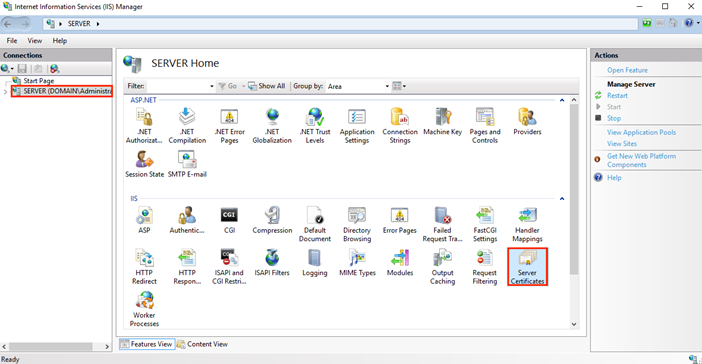
On the server name Home page (center pane), in the IIS section, double-click Server Certificates.
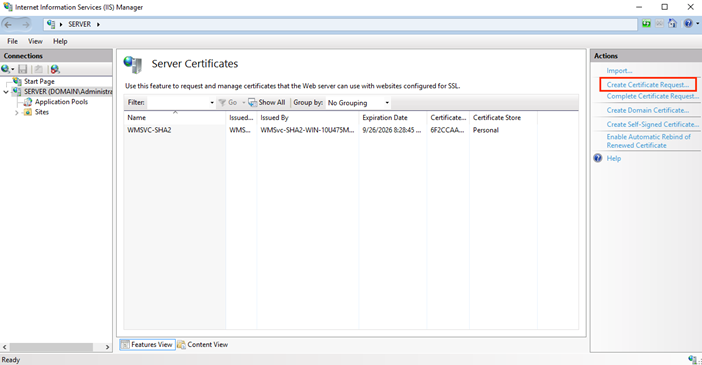
On the Server Certificates page (center pane), in the Actions menu (right pane), click the Create Certificate Request… link.
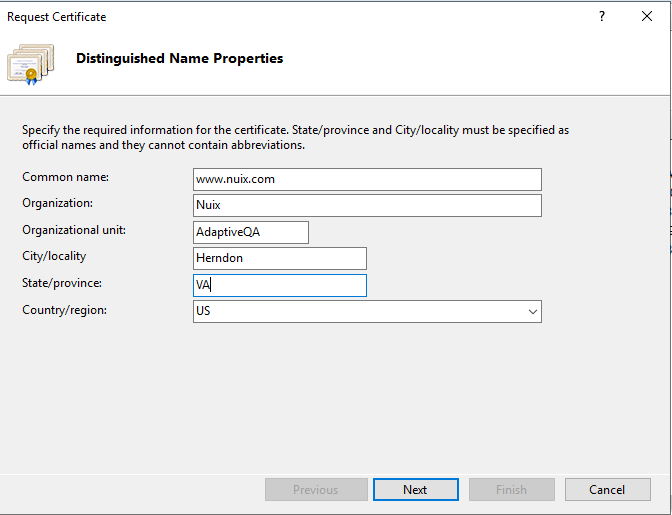
In the Request Certificate wizard, on the Distinguished Name Properties page, provide the information specified below and then click Next:
Common name: Type the fully-qualified domain name (FQDN) (for example, www.nuix.com ).
Organization: Type your company’s legally registered name (for example, Nuix).
Organizational unit: The name of your department within the organization. Frequently this entry is listed as "IT", "Web Security," or is simply left blank (for example, Adaptive QA).
City/locality: Type the city where your company is legally located (for example, Herndon).
State/province: Type the state or province where your company is legally located (for example, VA).
Country: In the drop-down list, select the country where your company is legally located. (for example, US).
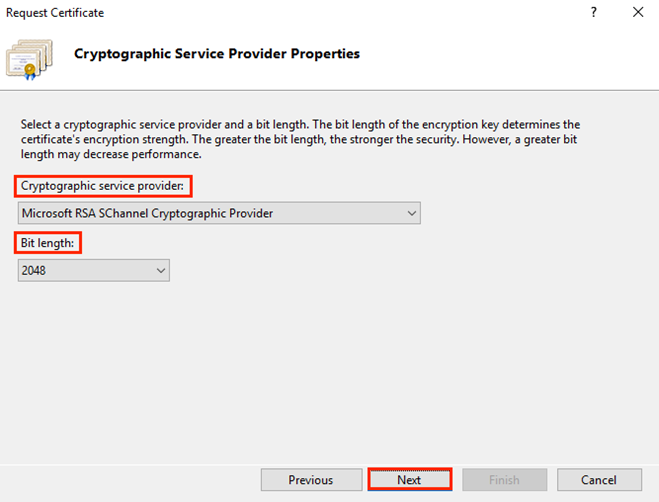
On the Cryptographic Service Provider Properties page, provide the information below and then click Next.
Cryptographic service provider: In the drop-down list, select ‘Microsoft RSA SChannel Cryptographic Provider’, unless you have a specific cryptographic provider.
Bit length: In the drop-down list select 2048, unless you have a specific reason for opting for larger bit length.
On the File Name page, under Specify a file name for the certificate request, click the … box to browse to a location where you want to save your CSR.
Note: Remember the filename that you choose and the location where you save your .csr file. If you enter a filename without browsing to a location, your CSR will end up in C:\Windows\System32.
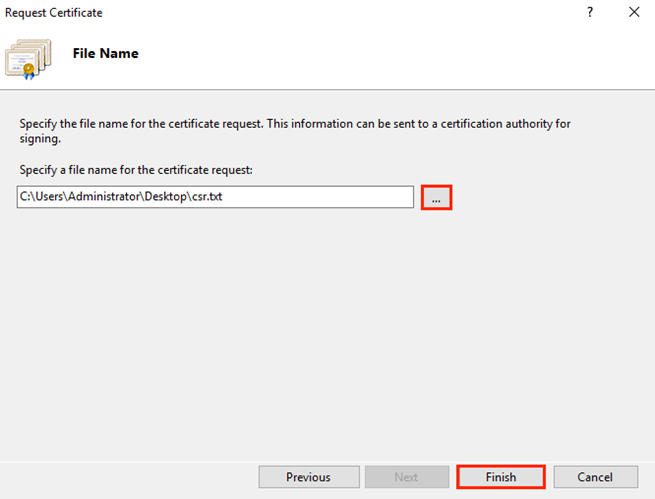
Click Finish.
With the CSR file created, the next step is to add the Subject Alternative Name fields to the .csr that was just created using an Administrator command prompt.
You will need the Hostname, IP address and FQDN of the server to create the file. You can copy these from the original certificate, or manually by running an ipconfig -all command and noting down the Host Name field, the DNS Suffix, and the IPv4 Address.
Add the Subject Alternative Name
To add the subject alternative name:
Create a new .inf file certsigningrequest.inf in the same directory as your .csr location and copy the following entries to the file. Replace the Subject with the subject from the .csr you created earlier. Replace the Hostname, IP Address, and FQDN entries with the server information.
[NewRequest]
;Change to your,country code, company name and common name
Subject = "C=US, S=VA, L=Herndon, O=Nuix, OU=AdaptiveQA, CN=www.nuix.com"
KeySpec = 1
KeyLength = 2048
Exportable = TRUE
MachineKeySet = TRUE
SMIME = False
PrivateKeyArchive = FALSE
UserProtected = FALSE
UseExistingKeySet = FALSE
ProviderName = "Microsoft RSA SChannel Cryptographic Provider"
ProviderType = 12
RequestType = PKCS10
KeyUsage = 0xa0
[EnhancedKeyUsageExtension]
OID=1.3.6.1.5.5.7.3.1 ; this is for Server Authentication / Token Signing
[Extensions]
2.5.29.17 = "{text}"
_continue_ = "dns=adaptive&"
_continue_ = "dns=localhost&"
_continue_ = "dns=WIN-GVC46H9RVO9&"
_continue_ = "dns=WIN-GVC46H9RVO9.hsd1.md.comcast.net&"
_continue_ = "dns=webUI&"
_continue_ = "ipaddress=127.0.0.1&"
_continue_ = "ipaddress=0000:0000:0000:0000:0000:0000:0000:0001&"
_continue_ = "ipaddress=10.0.0.165&"
Save the certsigningrequest.inf.
Generate the updated CSR by opening a command prompt and navigating to the directory where certsigningrequest.inf and your .csr file was saved.
Run the following command to generate the new CSR:
certreq -new certsigningrequest.inf server.csr
Select 'y' to overwrite the file.
Using OpenSSL, view the certificate request to confirm the SAN fields and the correct Subject with the following command:
openssl req -text -noout -verify -in server.csr
Here is a sample of the output:
Certificate Request:
Data:
Version: 1 (0x0)
Subject: C = US, ST = VA, L = Herndon, O = "Adaptive QA Test Server, Limited", CN = QATestServer, emailAddress = test@nuix.com
Subject Public Key Info:
Public Key Algorithm: rsaEncryption
RSA Public-Key: (2048 bit)
Modulus:
00:cc:ac:b8:f9:61:bf:ec:7c:12:03:a5:dc:d8:38:
a9:79:47:3e:9c:da:5c:84:94:da:76:c2:85:6f:11:
41:75:e3:86:9f:83:97:44:54:44:e8:92:c4:c9:9c:
b8:b6:ee:95:28:b2:9a:83:2c:54:65:15:e6:97:6b:
81:08:53:f2:2d:fe:30:96:79:d8:90:f9:9d:7d:87:
56:89:72:58:96:96:a3:2d:e4:15:a1:40:b5:4d:e9:
c3:df:d3:c9:f4:36:01:9f:31:09:32:bc:3e:6e:cd:
1d:7d:3f:5e:23:88:b7:91:63:5e:78:8c:13:13:a2:
64:07:25:75:29:61:b4:18:81:3e:58:7c:35:43:04:
ba:e7:33:31:8d:0e:2f:0c:9e:d7:7f:e1:1c:f0:2a:
fe:28:2a:2f:cf:57:68:56:fd:b6:20:4c:26:49:c4:
b6:e6:d9:fb:a1:a0:1c:be:1a:7a:4b:2d:de:7e:c0:
bd:2a:df:66:e2:6d:11:35:27:cd:5f:14:99:a6:c1:
4d:3e:aa:fa:fa:5a:63:d3:65:cb:7a:d2:46:fc:c1:
41:d8:1a:9e:ee:77:85:91:92:09:59:93:8d:a3:98:
80:48:df:e2:1b:4c:15:fe:fc:fc:26:72:9f:96:38:
a9:b1:2e:27:96:d6:f5:14:aa:a6:2b:88:74:b9:db:
68:4f
Exponent: 65537 (0x10001)
Attributes:
Requested Extensions:
X509v3 Subject Key Identifier:
38:AC:39:12:6E:B5:78:6E:9D:73:BF:A8:08:80:DD:C8:EC:7A:7D:5F
X509v3 Basic Constraints:
CA:FALSE
X509v3 Key Usage:
Digital Signature, Key Encipherment
X509v3 Subject Alternative Name:
DNS:adaptive, DNS:localhost, DNS:WIN-GVC46H9RVO9, DNS:WIN-GVC46H9RVO9.hsd1.md.comcast.net, DNS:AdaptiveQA CA, IP Address:127.0.0.1, IP Address:0:0:0:0:0:0:0:1, IP Address:10.0.0.165
Netscape Comment:
OpenSSL Generated Certificate
Signature Algorithm: sha256WithRSAEncryption
81:d8:b1:02:32:1c:41:18:f5:e8:e7:a5:07:98:9a:e7:c4:30:
7f:db:ca:08:0b:8c:f5:d0:3e:52:30:aa:2a:94:a9:2e:5a:72:
4c:07:f0:64:72:96:fe:fe:e2:07:df:22:8d:9e:b6:06:b7:ef:
b4:a7:ba:96:e1:93:32:b5:bc:33:2c:6a:9a:17:22:bc:cd:19:
a6:d8:13:30:a8:b2:87:81:01:0f:4c:0f:b3:0f:f8:34:ee:e8:
4f:b6:dd:27:26:d0:44:df:d5:c0:ce:ba:99:94:5c:9e:ec:55:
cf:43:4d:f3:c3:f2:13:90:e3:34:00:8b:37:3c:e2:fa:8c:0a:
80:14:8f:4d:e6:9a:c2:ef:d7:78:48:01:ac:7f:66:44:74:a8:
63:88:b8:c0:0b:c2:46:c4:6a:bf:84:af:51:39:cc:b1:44:d3:
49:06:12:a6:8b:56:18:60:73:81:18:75:05:e3:1a:2f:d8:20:
cd:b3:8e:85:d6:78:22:f9:d9:c7:91:cc:82:eb:35:9d:4d:c3:
20:df:4a:03:3b:6b:20:c8:ea:04:82:a2:b7:9f:10:98:8a:68:
49:bc:9c:93:27:88:51:5a:f2:dd:bb:af:a6:a1:b6:1d:09:32:
f4:b5:51:63:f9:f6:39:dd:36:d9:02:dc:ea:14:f3:07:23:db:
af:3d:2b:26
verify OK
After verifying the CSR is correct, sign it with the CA, see the CSR Signing section of CA Certificate Creation and CSR Signing.
Once you have a new server.cer file that is signed, you can return to IIS and complete the certificate request.
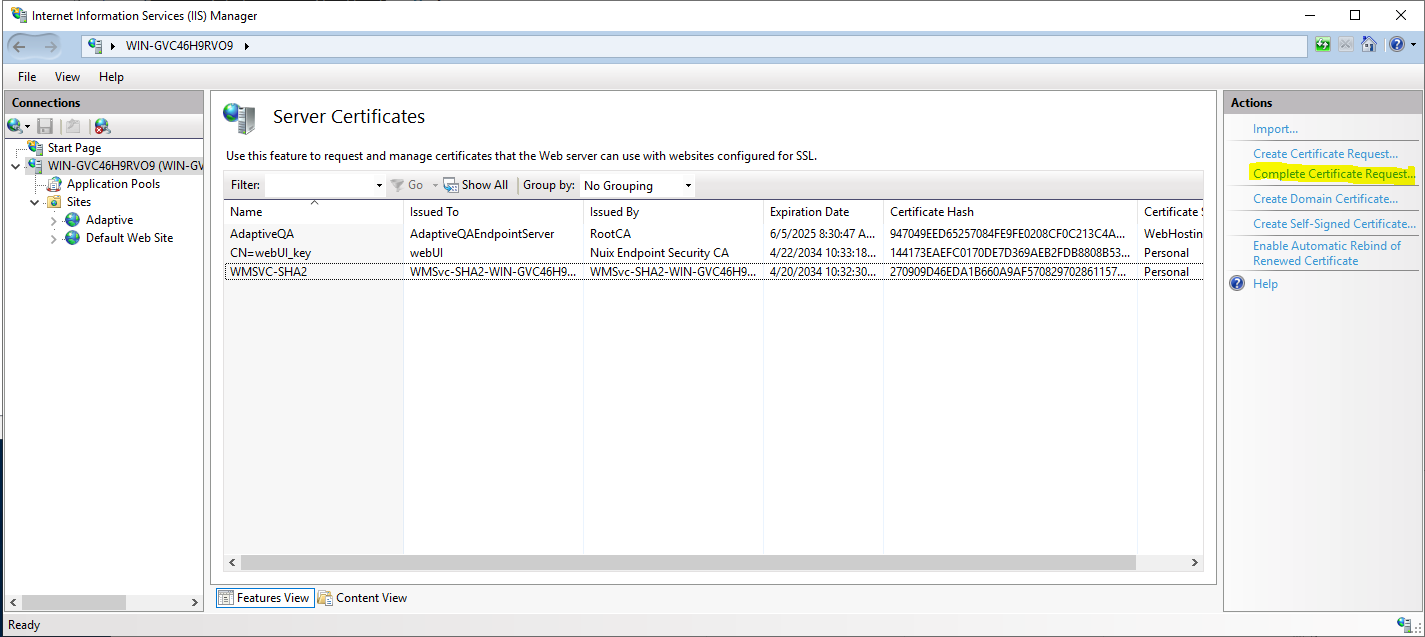
Complete the Certificate Request
To complete the certificate request:
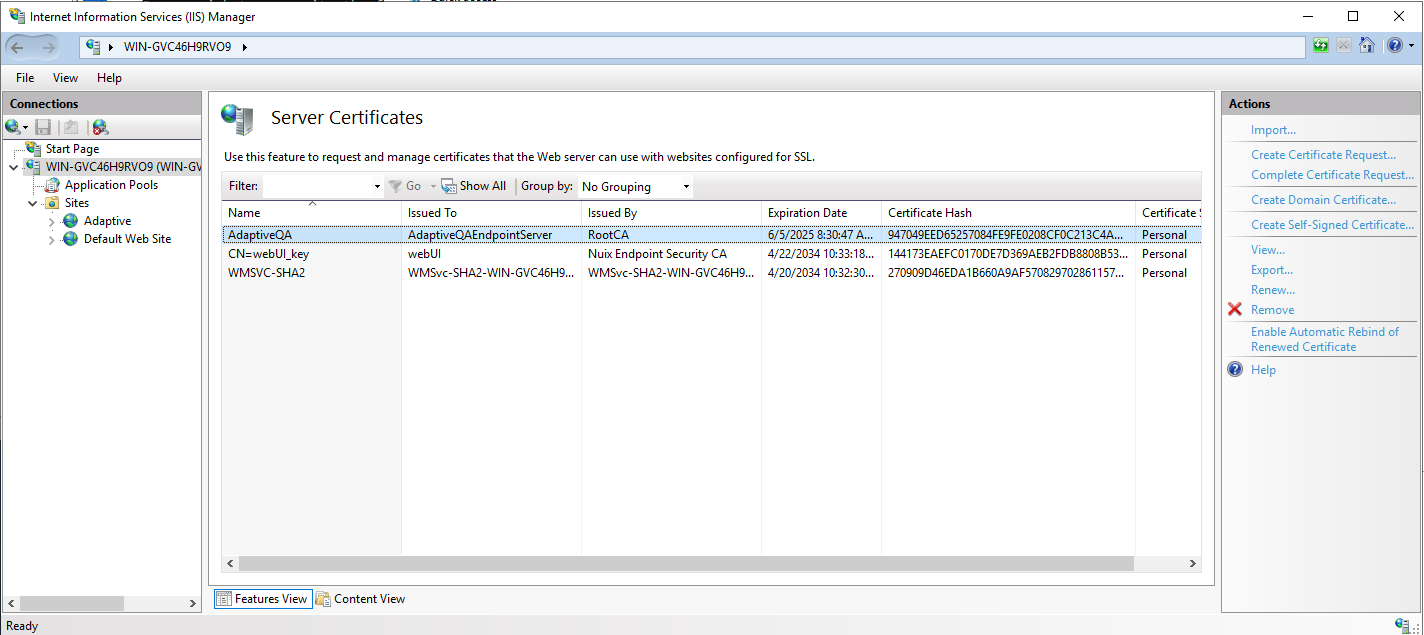
Enter the path to the server.cer file. Enter a friendly name and select Personal for the certificate store.

Click ‘OK’ to finish the Import. Next, you will see the new certificate listed in the Server Certificates.
Bind the certificate
To bind the certificate to the Nuix Adaptive Security site:
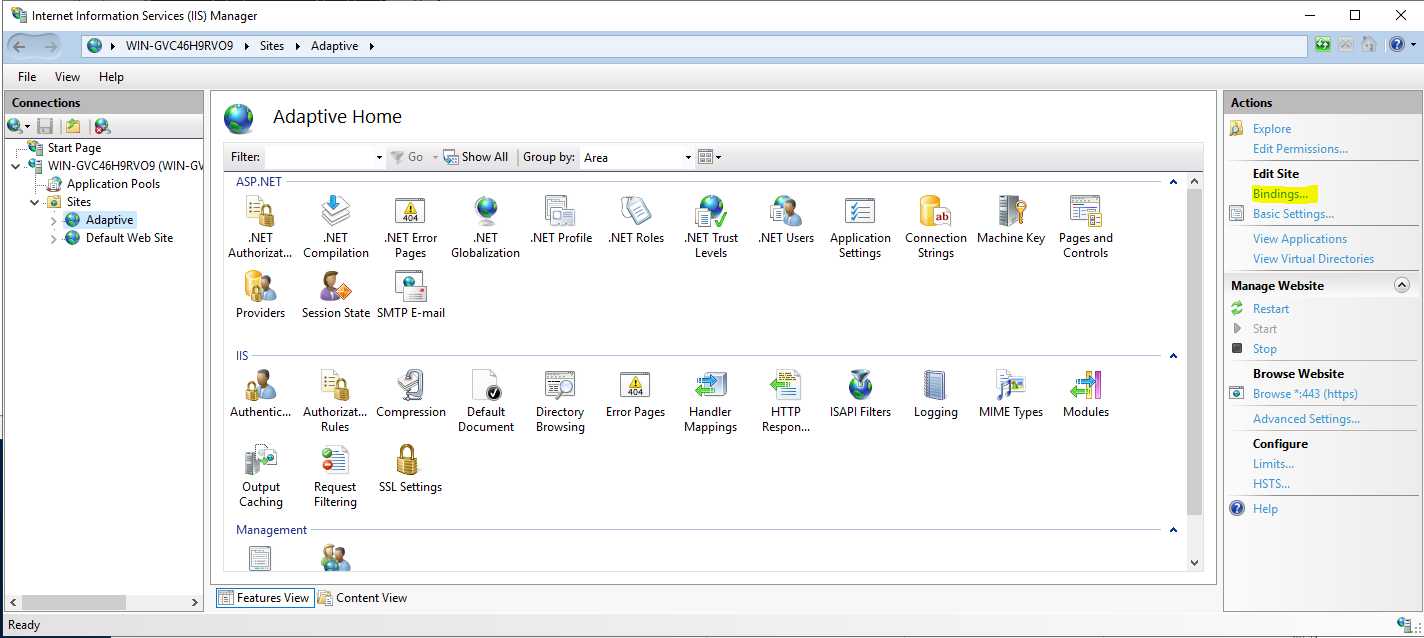
In IIS, select the Server > Sites > Adaptive.
in the right-hand Actions column under Edit Site select Bindings…
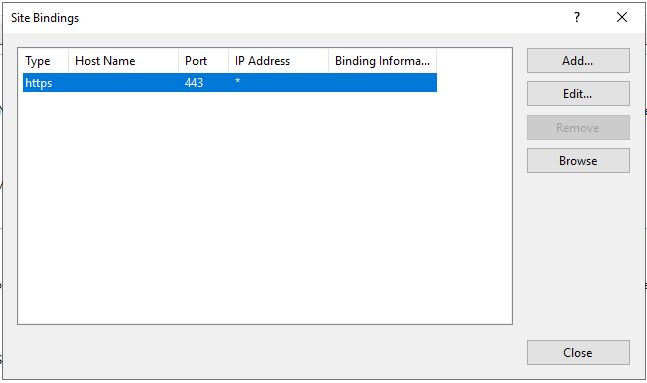
Select the https site binding and click the Edit… button.
Select your newly imported certificate from the SSL certificate dropdown.
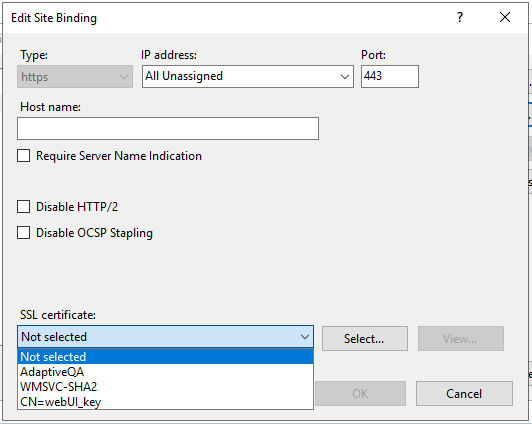
Click OK and close the site bindings window.
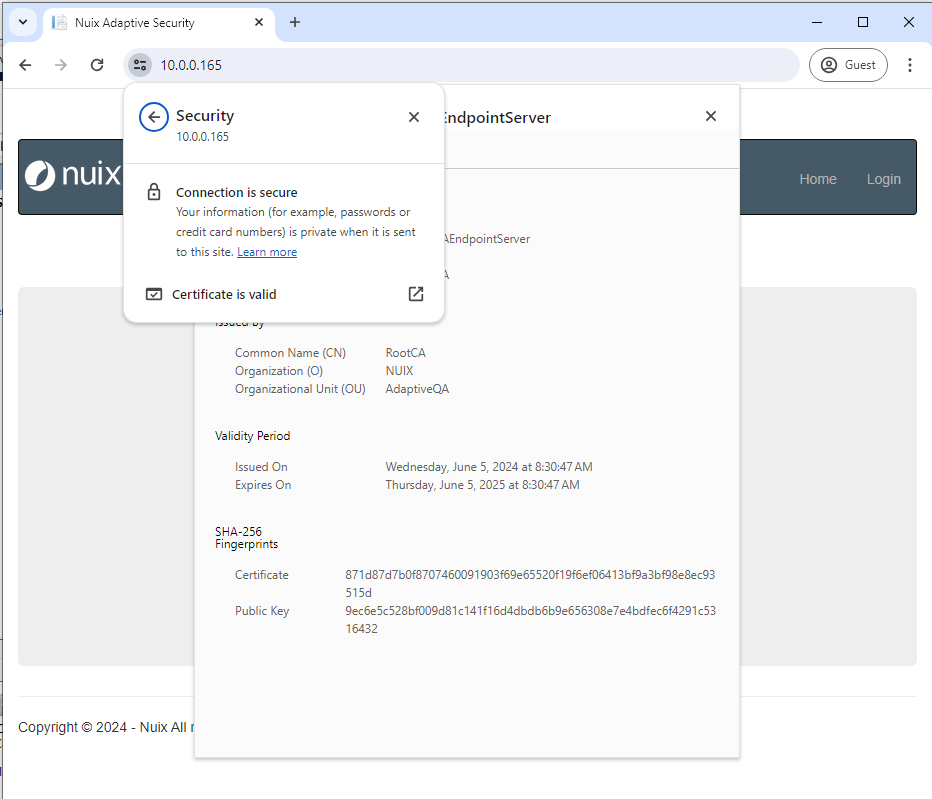
As long as the CA Certificate is installed into the Trusted Root CA certificate store on a client machine, then the Nuix Adaptive Security web connection is secure.