Evidence Browser reference
Evidence Browser is a flexible tool with three primary functions:
Review the contents of file collections — whether saved as an evidence file or as a folder of native files.
Extract "native" files from a FileSafe or other evidence file.
Perform ad-hoc file collections or extractions from any of the following:
A FileSafe, or other supported evidence file
A folder of "native" files
Note: Evidence Browser's ability to perform ad-hoc collections is limited to smaller source folder trees containing fewer than 100,000 native files. For regular file collections or extractions, use the Collector Wizard and/or Nuix Collector.
Evidence Browser overview
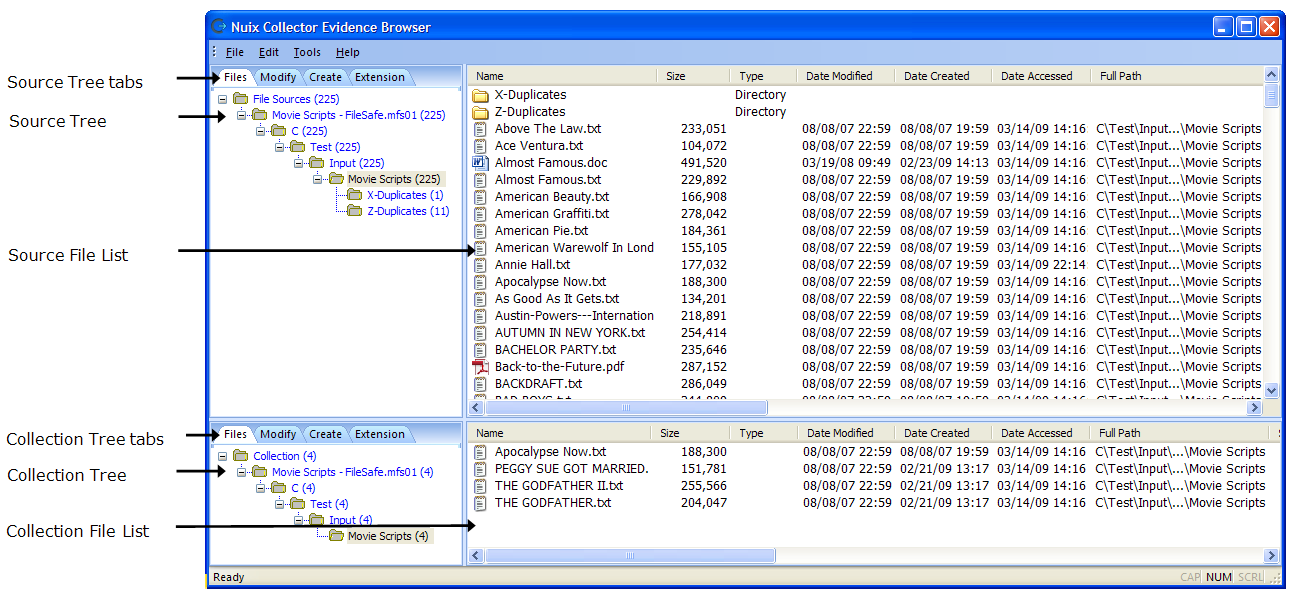
The Evidence Browser main window is divided as follows:
The Source Tree (upper-left) shows source directories and files which you can add to your collection.
The Collection Tree (lower-left) shows source directories and files currently in your collection.
The corresponding file lists at right show detailed information on files in the Source Tree and Collection Tree.
The Evidence Browser main window uses standard Windows navigation:
Expand or collapse trees by double-clicking the +/- sign adjacent the directory name.
Open a file in its native application by double-clicking a file name in the panes at right. For example, double-clicking a PDF file in the Source File List launches the file in Acrobat Reader.
Drag and drop column headings to reorder content horizontally.
Scroll left or right, up or down.
Sorting files
Both the Source Tree and the Collection Tree feature several tabs which let you change how files are displayed.
| Tab |
Displays |
| Files |
An expandable directory tree of folders and sub folders |
| Modify |
An expandable directory tree ordered by modification date |
| Create |
An expandable directory tree ordered by creation date |
| Extension |
An expandable directory tree ordered by file type (for example, MS Word, Excel, PowerPoint, or Adobe Acrobat) |
To change the current view of the Source Tree or Collection Tree, click the desired tab.
Zero date files
Zero date files have no Creation, Modification, or Last Access dates; or whose dates are otherwise unusable. Evidence Browser displays these files using the date/time code:
01/01/70 00:00:00 (GMT)
Configuring general options
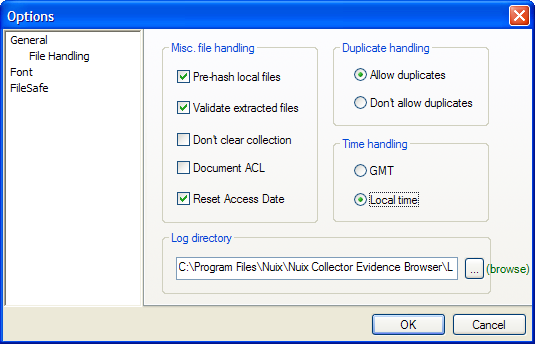
Evidence Browser lets you configure its appearance and logging function in the Tools > Options window, shown here:
Setting the time
By default, the program is set to local time, per your computer's system clock.
To change the time setting:
In the main window, click Tools > Options.
Under General > File Handling > Time handling, select GMT (Greenwich Mean Time) or Local Time.
Note: Changing this setting will affect the display and Selection Set criteria for files that fall between the new time setting and the previous time setting.
Resetting the log directory
Evidence Browser writes program activity to an XML log file, located by default in the ../Logs directory.
To change the log directory:
In the main window, click Tools > Options.
Under General > File Handling > Log directory, click the ... button, then browse to the desired folder.
Click OK.
Configuring the Access Control List
Windows stores an Access Control List (ACL) for each file. The ACL includes information about a file’s access rights. Evidence Browser can document the ACL list for every file it collects. This can be useful when trying to determine who had access to certain files.
The Document ACL option is disabled by default. When the Document ACL option is enabled, Evidence Browser creates an XML file for each file it collects. Each XML file:
Contains the access control list details for the corresponding collected file
Is saved to the log directory
Note: If you change the default log directory, the path to the ACL changes automatically. See topic Resetting the log directory for more information.
To change the Document ACL setting:
In the main window, click Tools > Options.
Under General > File Handling, check or uncheck the Document ACL checkbox.
Click OK.
Setting fonts
You can change the font used to display content in File Lists.
To change the font:
In the main window, click Tools > Options > Font > Font Color & Settings.
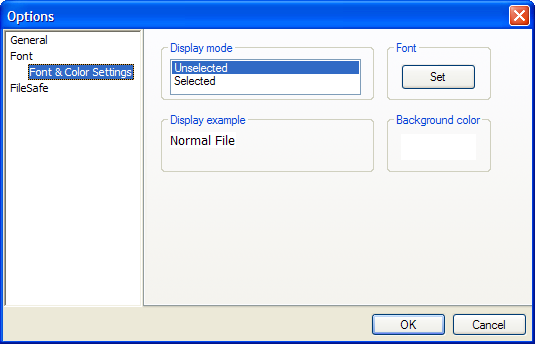
Under Display Mode, select a display mode.
Under Font, click Select.
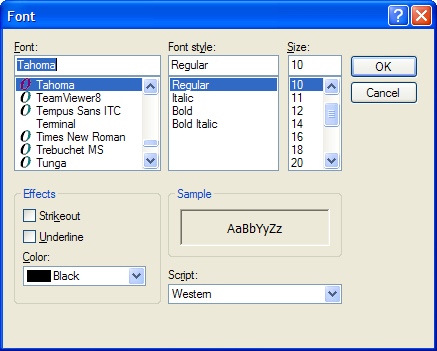
Use standard Windows navigation to set the font, then click OK.
Click OK to close the Options window.
Setting colors
You can apply color-coding in the Source Tree List to help distinguish between selected and unselected files.
To display filenames in colors based on their status:
In the main window, click Tools > Options > Font > Font Color & Settings.
Click the rectangular color swatch under Background Color. A color palette appears:
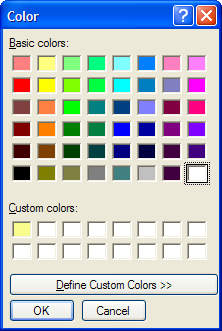
Use standard Windows navigation to set the background color, then click OK.
Click OK to close the Options window.
Importing source files
Specify a source directory or evidence file to crawl for relevant data.
In the main window, click File > Add Directory.
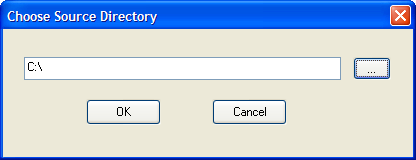
Click the ... button to open a standard Windows dialog where you can specify a directory on your local machine or a file share.
Click OK.
The Filter Criteria window displays. This dialog lets you create and edit custom filters, or apply pre-built filters to a data source.
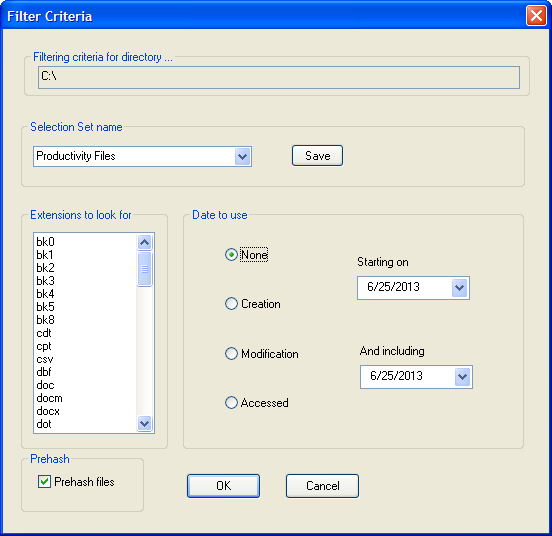
If desired, specify filtering criteria, as described in the section Using filters. Otherwise, simply click OK.
Evidence Browser crawls the directory, then displays the resulting files and documents in the main window.
Crawling an evidence file
In the main window, click File > Add Evidence.
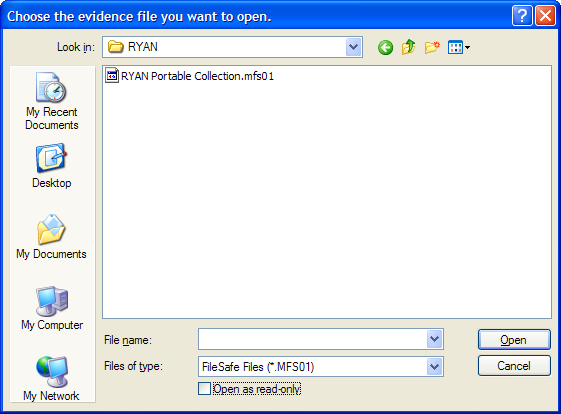
Use the down arrow in the Look in: field to specify the directory you want to crawl.
Use the down arrow in the Files of type: field to specify file format, then select the file from the refreshed list.
Click Open.
The Filter Criteria window displays. This dialog lets you create and edit custom filters or apply pre-built filters during a crawl.
If desired, specify filtering criteria, as described in the section Using filters. Otherwise, simply click OK.
Evidence Browser crawls the evidence file then displays the resulting files and documents in the main window.
Note: When creating a logical evidence file within EnCase, you must choose to include file hashes for Evidence Browser to be able to validate hashes. If hashes are not included, Evidence Browser will log hash errors for each file when it crawls the logical evidence file. For more information, see topic Understanding Hashes.
Building a collection
The process of selecting files or documents resulting from a crawl is called building a “collection.” You can build a collection from various sources (a file share and an evidence file, for example). Evidence Browser offers two ways to build a collection:
Manually: By dragging folders, sub folders, or individual files from the Source Tree or file list to the Collection Tree or Collection File List.
Note: When you select a folder, all nested folders and files are also selected; Evidence Browser automatically recreates the original directory structure in the collection.
Automatically: Using menu options to define a Selection Set based on file metadata such as file extension, owner/SID; and/or file creation, modification, or Last Access date.
Adding files manually
To add files to a collection manually drag and drop folders and files in the Source Tree or Source File List to the Collection Tree or the Collection File List.
Adding files automatically
Create a Selection Set to search a data source for files whose metadata matches parameters you define. Building a Selection Set lets you:
Apply it to other data sources in the current investigation.
Share it among other computers running Evidence Browser in the current investigation.
Use it in future investigations.
Note: The instructions in this section describe how to create and edit a Selection Set via the user interface. If you are proficient with XML, you can edit and save existing Selection Sets (XML files located in the ..\Sets directory, within the installation folder), or create new ones from scratch.
To add files to a collection automatically:
In the main window, click Tools > Selection Sets. The Selection Set dialog appears.
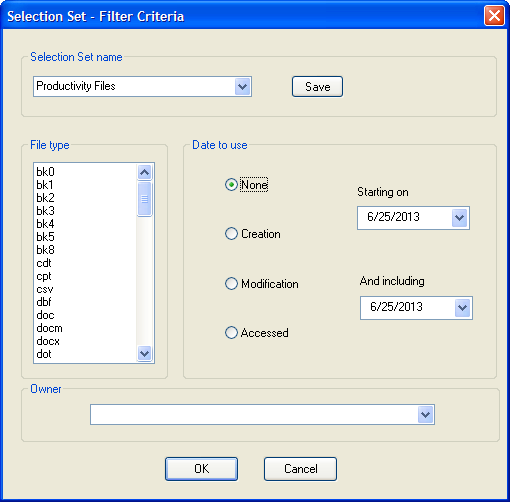
In the Selection Set name field, enter a name for your Selection Set. Use a simple yet descriptive name that another administrator would understand easily.
Note: The Selection Set name drop-down list is populated with ready-made Selection Sets based on common usage. The Extensions to look for list shows file types associated with the current Selection Set.
Under Extensions to look for: select a file type for which to search.
Under Date to Use, select the desired option, then use the adjacent dropdown lists to set a time frame for the crawl.
You can specify a date either by typing it directly or via the popup calendar that appears when you click the associated down arrow.
Under Owner, select files by the owner (SID) for inclusion in the Selection Set.
Click Save to apply the Selection Set.
Click OK.
The Selection Set is applied to your data source; files matching your selection set criteria are added to your Collection.
Editing a selection set
To edit a Selection Set:
In the main window, click Tools > Selection Sets.
Select an existing Selection Set in the Selection Set name drop-down list.
Change parameters for the Selection Set as desired.
Click Save to save the edited Selection Set.
Removing files from a collection set
You can remove folders, sub-folders, and files from a Collection Set.
To remove folders and files from a Collection Set:
Select the items you want to remove in the Collection Tree or Collection File List.
Press the Delete key on your keypad.
Note: By default, all items in the collection set (the lower portion of the screen) are automatically deleted when you perform an extraction. Actual files on disk or in an evidence file are unaffected. For more information, see topic Extracting a collection.
Using filters
In traditional electronic discovery, the sheer volume of data under examination makes preservation and collection time-consuming and expensive propositions. To streamline the discovery process, Evidence Browser lets you exclude certain files via de-duping and de-NISTing.
Understanding hashes
A hash is a sophisticated means of file authentication in which a 128-bit number is created based on the contents of the file, not including the file metadata. This number is often referred to as the file's digital fingerprint because it uniquely identifies it. Evidence Browser uses the MD5 (Message Digest 5) algorithm for creating file hashes, which enables the following:
Prevent file duplication in the collection — When a file in a collection already exists, Evidence Browser automatically compares the hashes of both copies, ensuring that they match. If they do not, the program writes an error message to the log file.
Ensures that extracted files are intact and uncorrupted — Evidence Browser automatically performs separate hashes of the source copy and the destination copy. If either of these two hashes do not match after the copy is completed, an error is noted in the log file.
Configuring pre-hashing
By default, Evidence Browser pre-hashes every file in a data source during a search.
To disable pre-hashing:
In the main window, click Tools > Options.
In the Options window, under Misc. file handling, de-select the Pre-hash local files checkbox.
Note: You must pre-hash documents and files during a crawl if you intend to use Evidence Browser’s de-dupe and de-NIST features later. Use caution when setting this option.
De-Duping
Use Evidence Browser's powerful de-duping feature to exclude redundant files from a collection. When enabled, this feature creates a duplicate hash database (.dat file) in the Hash/Duplicate directory, which you can:
Apply to other computers, data sources, or projects.
Clear globally or selectively.
To configure de-duping:
In the main window, click Tools > Options.

Under General > File Handling > Duplicate handling, choose a setting:
Allow duplicates: Allow duplicate files to be added to an existing collection.
Don’t allow duplicates: Do not allow duplicate files to be added to an existing collection.
Click OK.
Note: As the duplicate hash database get larger, Evidence Browser segments its contents, creating multiple .dat files.
You may find it useful to back up the duplicate hash database, so you can later revert to its previous state. A hash backup can also be useful if you are working with multiple projects. To back up the duplicate hash database, use standards Windows navigation to copy the ..\Hash\Duplicate directory to another destination.
In some cases, you might want to clear the duplicate hash database. To clear the duplicates hash database, click Tools > Clear Duplicates Hash Sets.
Note: Always back up your duplicate hash database before clearing it.
Filtering non-user data files
Excluding irrelevant files from a collection can save considerable time and storage space. With Evidence Browser, you can automatically exclude non-user data files (such as OS files or executables) from the Evidence Tree in two ways:
Import and apply NIST hash set (or “de-NIST”)
Create and apply a Known Files Hash Database
De-NISTing
One of Evidence Browser's most powerful features — one that can greatly reduce resources needed for data collection — is the ability to import the NIST (NSRL) hash set. Developed and maintained by the National Institute of Standards and Technology, it is a massive database of file hashes developed to distinguish machine-generated files from user files and documents.
Note: For more information on NIST files, visit the National Institute of Standards and Technology web site: http://www.nsrl.nist.gov/
To import the NIST (NSRL) hash set:
In the main window, click Tools > Import NIST Hash Sets.
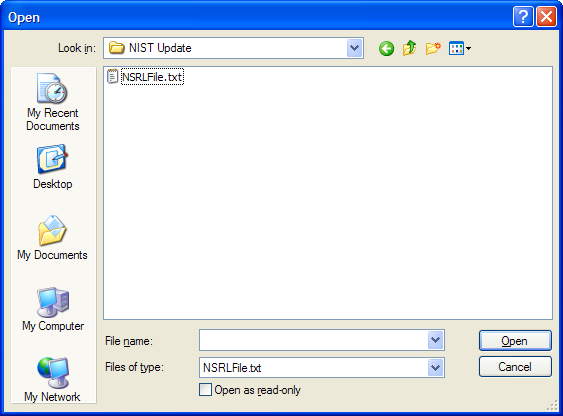
Navigate to the desired NIST hash set (NSRLFile.txt), select it, and then click Open.
Note: If you try to import a non-NIST file, unexpected behavior may result.
Evidence Browser imports the NIST hash set into the Source Tree. Because NIST hash sets are very large files, this operation might take several minutes.
Using a known files hash database
Evidence Browser lets you selectively filter certain file types from a search. When applied, the Known Files Collection excludes these file types from the Source Tree.
To add files to the Known Files Hash Database:
Run Nuix Collector Evidence Browser and drag the files you want to ignore into the Collection Tree or Collection File List.
In the main window, click File > Include in Known Files. This will add the files you selected in Step 1 to the Known Files Hash Database stored in the sub-folder \Hash\Standard, located within the Nuix Collector Evidence Browser installation folder.
To establish several distinct Known Files Hash Databases:
Exit out of all Nuix Collector Suite products.
Run Windows Explorer and copy the Standard known files folder (e.g.: C:\Program Files\Nuix Collector Evidence Browser\Hash\Standard) to a new folder. Give the new folder a meaningful name, e.g. StandardDesktopImage.
Optionally delete the files within the Standard known files folder. You can then run Evidence Browser and start a new Known Files Hash Database in the Standard folder.
Repeat the above steps as needed.
When configuring a collection or extraction with the Nuix Collector Wizard, specify one of the new known files folders, rather than the Standard known files folder.
File access dates
Nuix Collector Evidence Browser cannot preserve the Last Access date of files accessed during the crawl of a local or network directory.
In the main window, the option under Tools > Options > Reset Access Dates offers two selections:
Checked: No impact (same as Unchecked).
Unchecked: Evidence Browser updates the Last Access dates and times of files it crawls to the current date and time.
Note: When the input source is an evidence file container, the Last Access dates and times of the files within this evidence file container are never altered by Nuix Collector Evidence Browser activity.
When saving collected or extracted files – whether to a FileSafe or to Native Files – Nuix Collector Evidence Browser always sets the Creation and Modification dates and times according to the original dates and times of the corresponding input source files.
Extracting a collection
This section describes Evidence Browser's validation features and explains how to extract evidence collections from a variety of evidence file formats.
Configuring validation
By default, Evidence Browser validates all extracted files by comparing the hash that is accumulated during the extraction process against the hash stored within the original evidence file container.
Evidence Browser can also hash the resulting extracted files (at the Destination) to ensure that the destination media is stable. You can disable this feature.
To disable validation:
In the main window, click Tools > Options.
De-select the Validate Extracted Files checkbox.
Click OK.
Retaining extracted files
By default, all items in a collection are automatically removed from the Collection Tree and Collection File List after you extract them.
To retain files in a collection after extraction:
In the main window, click Tools > Options.
Select the Don’t Clear Collection checkbox.
Click OK.
Extracting evidence to a FileSafe container
FileSafe files are a logical evidence file format for holding evidentiary files and metadata.
To specify a FileSafe as the destination:
In the main window, click File > Create FileSafe.
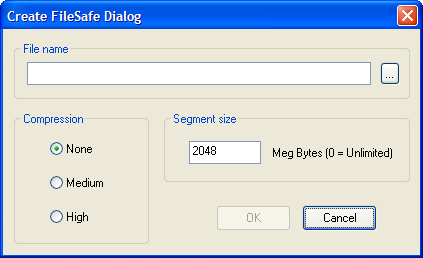
In the File name field, enter a full path file name, or click the ... button then specify a destination folder using standard Windows navigation.
Set the compression level (optional).
None: (Default) Fastest processing, largest file size
Medium: Slower processing, medium file size
High: Slowest processing, smallest file size
Set the maximum segment size (optional).
Evidence Browser lets you set a maximum segment size for FileSafe containers. Segmenting can be useful when your collection is large but your storage medium is limited (if you are using a FAT32 hard drive, for example).
Depending upon settings and the size of your collection, Evidence Browser might divide the collection into multiple FileSafe containers.
To specify an unlimited file size, so the FileSafe will be saved as a single file, specify a Size of 0.
The default Segment Size is 2 GB.
Click OK.
Evidence Browser creates the FileSafe container in the designated folder.
Note: To change the default setting when creating a FileSafe container, click Tools > Options > FileSafe. Edit compression and segment size settings as desired, then click OK.
Extracting exact native copies
After building the Collection Set, select the disk location where exact native copies of files in your collection will be placed.
To select a disk location:
In the main window, click File > Extract Files.
Use the Windows dialog to select a destination folder.
Click OK.
Evidence Browser copies the collection to disk, recreating the original folder structure in the destination folder.