Importing and exporting data
Administration Console offers an Export feature which can save lists of artifacts, computers and jobs. These lists are saved in XML files or tab-separated text files.
Note: Administration Console's Active Directory import features operate only from Windows computers.
Exporting artifacts
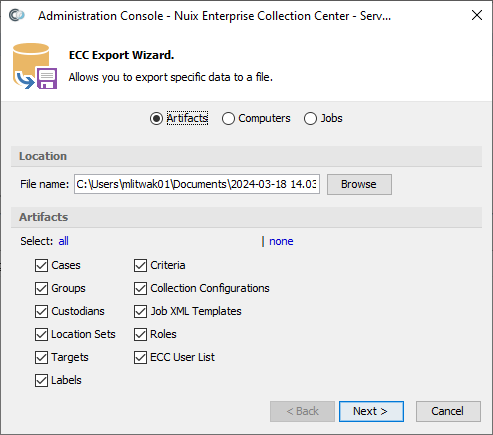
The following artifacts can be saved to an XML file:
| Cases Groups Custodians Targets |
Criteria Collection Configurations Job XML Templates ECC User List |
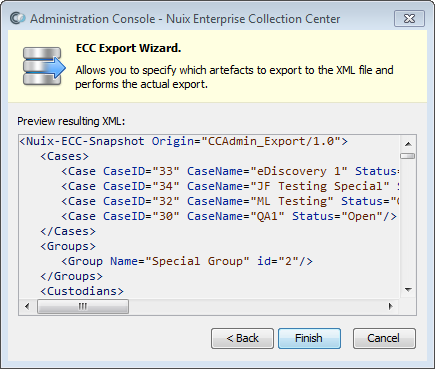
The resulting XML export file can be edited, if necessary, and then restored to an ECC Server via the Import from XML feature (note warnings at the end of this topic).
To export Artifacts from the ECC Server to an XML file:
Click the  button near the upper-right corner of the screen to access the menu, then select Export. The ECC Export Wizard displays:
Note: The File name may be so long that you cannot see the entire name, as in the example above. You can use the left and right arrow keys to scroll horizontally in the File name field, or select all the text in this field and press Ctrl+C to copy it to the Clipboard.
Select the items to export, then click Next. A Preview of the resulting XML appears:
Click Finish. The file is saved to the File name specified on the previous screen.
Warning: The Export feature does not produce a comprehensive backup of the ECC Server. Certain items, including active and scheduled ECC Collection Jobs, ECC Client Parameters and ECC Server Log Files are not included in the Export.
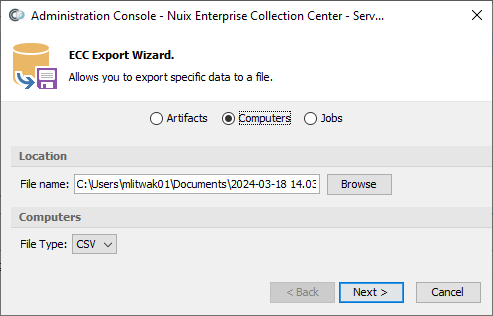
Exporting computers
A list of Computers can be saved to a tab-separated text file. The exported list includes the Computer ID for each computer. Computer IDs can be referenced when importing new Targets into ECC.
To export a list of Computers to a tab-separated file:
Click the  button near the upper-right corner of the screen to access the menu, then select Export.
Select the Computers option:
Note: The File name may be so long that you cannot see the entire name, as in the example above. You can use the left and right arrow keys to scroll horizontally in the File name field, or select all the text in this field and press Ctrl+C to copy it to the Clipboard.
Click Next to display a preview of the export.
Click Finish to save the file.
Note: The tab-separated file is given a .CSV filename extension so it can be easily opened in Microsoft Excel.
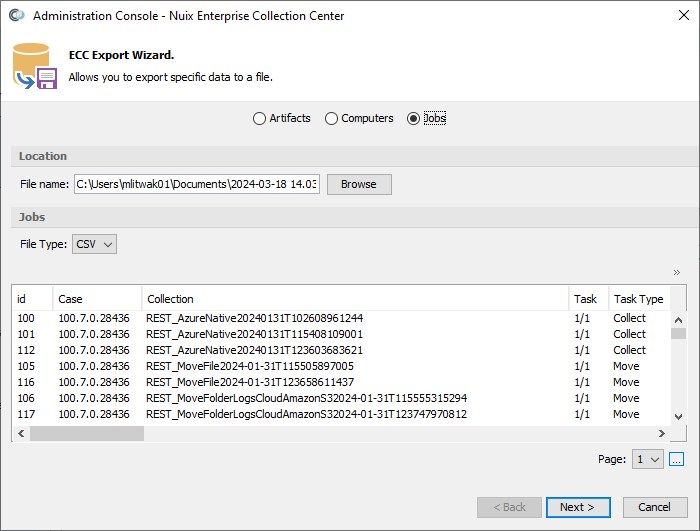
Exporting jobs
A list of Jobs can be saved to a tab-separated text file for reporting or other purposes. Jobs can be filtered by job type, date range, computer(s) and several other criteria. The columns (fields) to export can also be specified.
To export a list of Jobs to a tab-separated file:
Click the  button near the upper-right corner of the screen to access the menu, then select Export.
Select the Jobs option:
Note: The File name may be so long that you cannot see the entire name, as in the example above. You can use the left and right arrow keys to scroll horizontally in the File name field, or select all the text in this field and press Ctrl+C to copy it to the Clipboard.
For easier viewing you can widen the screen by placing the mouse pointer on the lower right corner and then dragging to the right.
Click the ̀» button just above the list of jobs, on the right, then choose Show/hide columns. You can then check or uncheck the columns to appear both on-screen and in the exported CSV file.
Click the ̀» button again, then choose Filter Jobs... to select which jobs will be exported. The Table Row Filter screen appears:
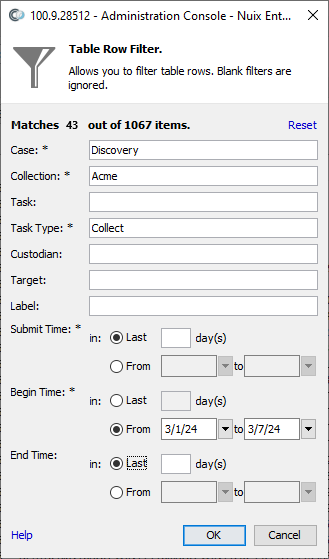
Note: In the example filter shown, above, 43 jobs will be exported out of a total of 1067 jobs. These 43 jobs meet all of the specified filter criteria:
The job’s Case name contains “Discovery”
The job’s Collection name contains “Acme”
The task type is Collect (i.e. a file collection)
The job began in the first week of March 2024.
Specify filter criteria, then click OK to return to the ECC Export Wizard.
Click Next to display a preview of the export. The preview shows only the first 100 jobs at most.
Click Finish to save the file and close out of the Export screen.
Note: The tab-separated file is given a .CSV filename extension so it can be easily opened in Microsoft Excel.
Importing data from an XML file
You can import items which were previously saved to an Export XML file. This Export XML file could have been produced by Administration Console, or by another application.
To import data from an export XML file:
Click the  button near the upper-right corner of the screen to access the menu, then select Import. The ECC Import Wizard displays:

Select The Export XML, then click Next. The ECC Import Wizard then prompts for the Export XML file:
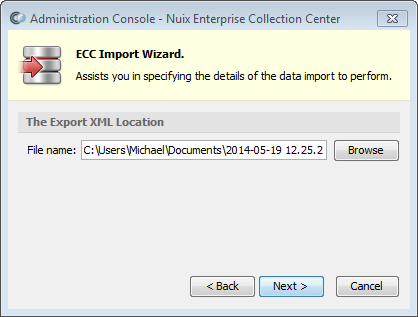
Enter the full File name of the Export XML file, then click Next. The ECC Import Wizard will show the differences, if any, between the current ECC items and the items being imported:
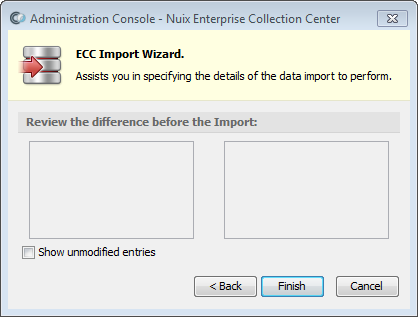
Click Finish to import the items from the XML file.
Importing data from Active Directory
You can import Active Directory user accounts into ECC, where they are saved as Custodians.
To import custodians from Active Directory user accounts:
Click the  button near the upper-right corner of the screen to access the menu, then select Import. The ECC Import Wizard displays:
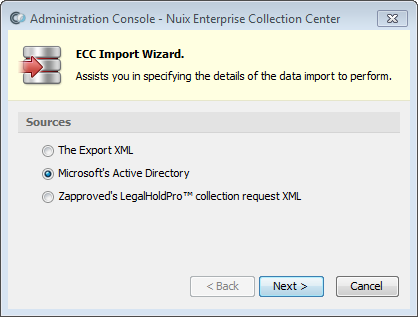
Select Microsoft's Active Directory and click Next.
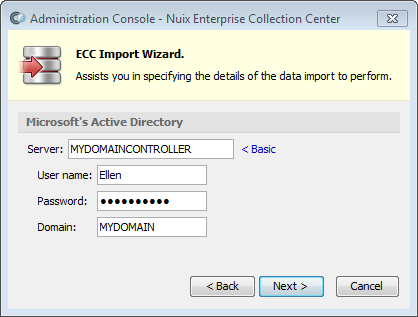
Specify the name of a Server – typically an Active Directory domain controller – holding the user accounts you wish to import. Click the Advanced link if you need to specify an Active Directory user account to use to connect to the Domain Controller. Click Next.
The ECC Import Wizard will take a few moments to communicate with the specified Server before presenting the Active Directory User Table:
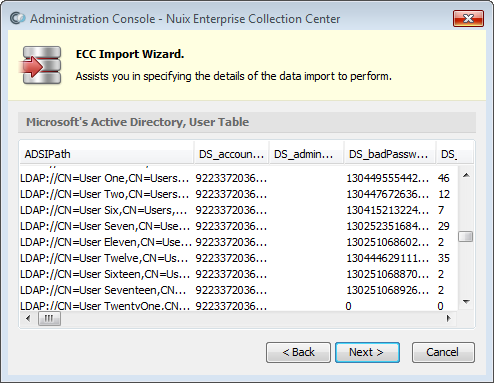
Note: The ECC Import Wizard 's User Table includes user accounts from all Active Directory containers and organizational units. This screen can be stretched to reveal additional columns. You can also stretch the individual column widths, reorder columns (by dragging column headings), or sort users by clicking a column heading.
Click Next to display the Import Wizard's Field Mapping screen:
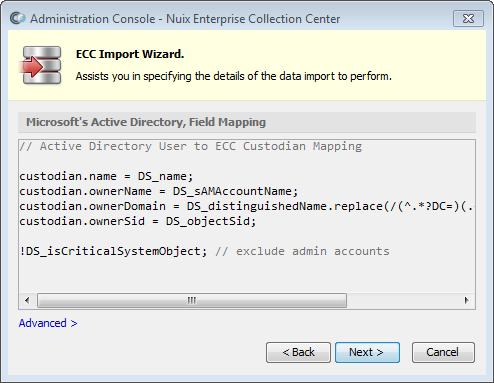
From the Import Wizard's Field Mapping screen, you can review the ECC Custodian field names shown on the left, and the corresponding Active Directory user account field shown on the right. If necessary, you can click the Advanced link to modify this field mapping table.
When done reviewing/editing the Field Mapping, click Next to display the Import Wizard's Review Differences screen:
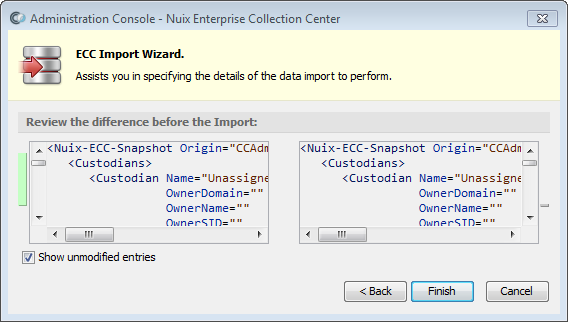
From the Import Wizard's Review Differences screen, you can see the Active Directory user account records on the left side, as well as the existing ECC records shown on the right. Differences are highlighted whenever Show unmodified entries is unchecked.
When ready, click Finish to import the Active Directory user accounts into ECC.
Tip: If the Active Directory Import creates Custodians in ECC that you do not want, you can delete these Custodian records.
Importing data from Legal Hold Pro
You can import items from a Legal Hold Pro collection request file.
To import data from Legal Hold Pro:
Click the  button near the upper-right corner of the screen to access the menu, then select Import. The ECC Import Wizard displays:
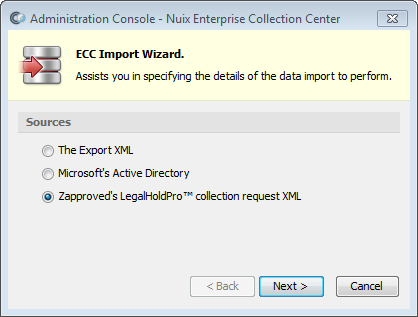
Select Zapproved's LegalHoldPro™ collection request XML, then click Next.
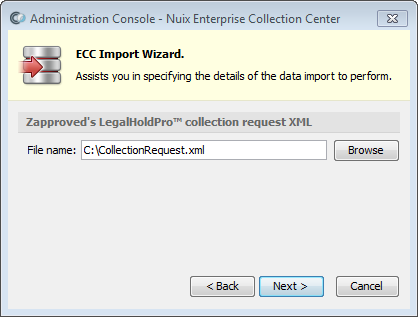
Specify the file name of the Collection Request which you previously saved from Legal Hold Pro, then click Next to display the Import Wizard's Review Differences screen:
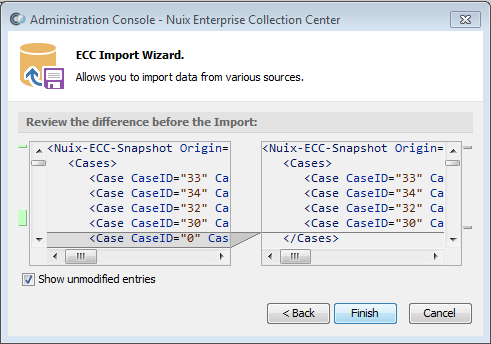
From the Import Wizard's Review Differences screen, you can see the Legal Hold Pro records on the left side, as well as the existing ECC records shown on the right. Differences are highlighted whenever Show unmodified entries is unchecked.
When ready, click Finish to import the Legal Hold Pro items into ECC.