Configure
Perform the following steps to configure your upgraded installation.
Restore configuration settings
Once the installer has completed, restore the previous configuration settings to the upgraded installation using the Nuix Configuration Utility.
Before you begin
Modern browsers such as Google Chrome and Mozilla Firefox have adopted an HTTPS-first approach to the web that auto redirects non-secure HTTP based URLs to HTTPS by default.
After performing an upgrade, Nuix Neo components are unsecured. If SSL security was enabled in your environment prior to upgrade, the use of a Fully Qualified Domain Name (FQDN) to access Nuix Neo components cannot be used until after your configurations have been restored. This is because FQDN based URLs are redirected to HTTPS, making the URLs inaccessible. IP addresses, however, can be used to complete the steps in this section as they will bypass the HTTPS-first behavior of modern browsers.
To restore the previous configuration settings:
Access the Nuix Configuration Utility using one of the following methods:
If Nuix Gateway is installed locally: http://127.0.0.1:8999/config.
If Nuix Gateway is installed on another host: http://<public_private_IP>:8999/config.
Note: If using a public or private IP address over HTTP and you receive an Invalid parameter: redirect_uri error message, you must add the address as a valid redirect URI in your Nuix web apps Keycloak client configuration.
For example: http://<public_private_IP>:8999/*
Sign in using the Nuix client admin user account that was created during the initial Keycloak configuration.
After being redirected to the Nuix Configuration Utility, click Admin, then select Snapshots.
Locate the most recent snapshot from the previously installed version and click Apply. Confirm the selection.
Note: Nuix Neo creates snapshots automatically when initiated for the first time and after configuration changes are made. Ensure that the snapshot that is selected is from the previously installed version.
Restart all installed Nuix Neo applications to complete the upgrade process.
After applying the snapshot and restarting all services, all Nuix Neo components will be accessible again from their previously configured URLs, including HTTPS and fully qualified domain names.
Update database connection (v9.10.x only)
If a v9.10.x based snapshot is applied after upgrading, the database connection used by Nuix Investigate must be updated to remove the previous MariaDB connection and add the new PostgreSQL connection.
To configure a PostgreSQL database connection:
From the Nuix Configuration Utility, select the Admin tab, then the Database Connection tab from the navigation bar.
Enter the following required connection details for the PostgreSQL instance:
Host: The hostname of the server where PostgreSQL is installed.
Port: The port used to access PostgreSQL.
Database Name: The root database name. (Default: nuix).
Username: The username with access to the PostgreSQL instance.
Password: The password for the user.
Note: For an HA environment, the host must be the IP address of the PostgreSQL server and remote connections must be allowed.
Click Test Connection to verify that the provided details are valid.
Note: The database connection cannot be saved until it has been successfully tested.
Click Save changes to finalize the connection.
This verifies the connection settings, but not connectivity.
Restart Nuix Neo services for the change to take effect.
It is recommended to restart the services in the following order:
Nuix-Config
Nuix-Registration
Nuix-Gateway
Nuix-Derby-Control
Nuix-Investigate
Migrate MariaDB data to PostgreSQL (v9.10.x only)
Older versions of Nuix Investigate used MariaDB as the configured database. Starting with Nuix Neo, all installations now use PostgreSQL to store and manage data. If upgrading from v9.10.x, the existing MariaDB instance must be migrated to PostgreSQL in order to preserve users that were manually created.
Important: Users imported through LDAP or SSO are not included with this migration. To recreate these users, LDAP or SSO must be reconfigured within the upgraded Nuix Neo installation.
Nuix provides a migration tool to perform the following tasks:
Connect to the legacy MariaDBb instance.
Connect to the new PostgreSQL instance.
Pull, transform, and push data from MariaDB to PostgreSQL.
Validate that data transfer has completed successfully.
Prerequisites
The following prerequisites must be met to ensure a successful data migration.
Nuix-MariaDB service has been backed up.
9.10.x installation has been upgraded to Nuix Neo v100.2.
A configuration snapshot has been applied and the database connection updated to PostgreSQL.
Nuix Keycloak, Nuix PostgreSQL, and Nuix Investigate services are running.
Add dbshift schema to database
The migration tool requires that an additional dbshift schema be added to the Nuix PostgreSQL database to facilitate the data transfer.
To add the dbshift schema to the database:
Download and install the latest version of pgAdmin 4:
https://www.postgresql.org/ftp/pgadmin/pgadmin4
Within pgAdmin, register a new server using the connection details for the newly installed PostgreSQL database:
Expand the Object menu from the navigation bar, then expand the Register menu and click Server.
Provide a Name for the server on the General tab.
Select the Connection tab and provide the following details:
| Property |
Value |
| Host name / address |
localhost or the FQDN where PostgreSQL is installed. |
| Port |
5432 (default) |
| Maintenance database |
nuix |
| Username |
nuix (default) |
| Password |
Specified during installation |
Click Save.
Expand the new server in the side navigation and then expand Databases > Nuix.
Right-click Schemas and then select Create > Schema.
Enter dbshift as the schema name and click Save.
Right-click the investigate schema and then expand Tables and verify that tables exist.
The dbshift schema setup is now complete.
Migration tool setup
Use the following steps to download and prepare the migration tool:
Download the latest JAR of the migration tool from the following location:
https://artifactory.uat.nuix.com/ui/native/investigate-maven-dev-local/com/nuix/us/dbshift/
Note: The migration tool is currently only available internally at Nuix.
Using a text editor, create an application.yml config file using the following example. Update all values to match your installation.
connection:
datasources:
DBSHIFT:
url: 'jdbc:postgresql://localhost:5432/nuix?currentSchema=dbshift'
username: nuix
password: testing123
WR:
url: 'jdbc:mariadb://localhost:3306/wr'
username: nuix
password: testing123
UMS:
url: 'jdbc:mariadb://localhost:3306/ums'
username: nuix
password: testing123
INVESTIGATE:
url: 'jdbc:postgresql://localhost:5432/nuix?currentSchema=investigate'
username: nuix
password: testing123
Save the config file in the same location as the migration tool.
Migrate data to PostgreSQL
To use the tool to migrate data from MariaDB to PostgreSQL:
Open a terminal window and run one of the following commands to open the tool:
java -jar dbshift<version>.jar
Alternatively, the JRE installed with Nuix Neo can also be used:
C:\Program Files\Common Files\i4j_jres\{version}\bin> .\java.exe -jar .\dbshift-0.0.1-main.jar
Note: If errors are encountered when starting the application, view the console logs to identify the cause. The most common error is usually a connection time out that is caused by incorrect details in your application.yml file.
If the connection details provided in the application.yml file are correct, the DBSHIFT console will be displayed and a dbshift:> prompt is provided.
At any time, enter help to view all available commands.
Verify the connection details using the following command:
connect info
Start the migration of data from MariaDB to PostgreSQL using the following command:
transfer run -p INVESTIGATE
If the migration completes without any errors in the console, the data transfer was successful.
Proceed to Export UMS user data to continue using the migration tool to retrieve UMS user data.
Troubleshooting possible migration issues
"dbshift.batch_job_instance" does not exist
This error occurs when the dbshift schema is either not present or initialized.
To fix:
See Add dbshift schema to database or run CREATE SCHEMA dbshift in PostgreSQL while logged in as the configured Nuix database user.
"investigate.wr_db_version" does not exist
This error occurs when the Investigate schema has not yet been initiated:
To fix:
Ensure that the database connection in the Nuix configuration tool is configured to connect to the installed Nuix PostgreSQL service and that all Nuix services (specifically Nuix Investigate) have been started so that the schema is initiated.
Export UMS user data from MariaDB
Use the migration tool to export UMS user data to a JSON file that can be partially imported later within Keycloak.
To export UMS user data:
Access the tool migration tool using the steps provided in the Migrate data to PostgreSQL section.
Export UMS user data using the following command.
users export
When complete, a user-export.json file will be generated in the root of the directory where the export command was run.
Note: User credentials are not included with the user data exported from UMS. Credentials will need to be reset after the user data is imported within Keycloak.
Import legacy users into Keycloak
Once legacy UMS user data has been exported from UMS, the users can be imported into Keycloak for use with Nuix Neo.
To import legacy user data into Keycloak:
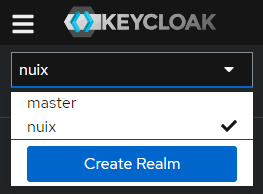
Access the Keycloak admin console.
Expand the realm menu from within the Keycloak Admin Console and select Nuix from the list.
From the sidebar, select Realm settings then select Partial import from the Action menu.
On the Partial import screen, click Browse and navigate to the UMS users file that was exported.
user-export.json
Click Open to select the file.
Select all of the available resources to import and select to Fail import if a resource already exists.
Click Import, then click Close after the import has completed.
Select Users from the side navigation within Keycloak to set up credentials for the newly imported users.
Migrate user and group data
Restore the user and group data that was backed up prior to the upgrade.
Important: This must be performed before users attempt to log in.
To migrate user and group data for legacy users:
Locate the backups made prior to upgrade.
Place the contents of each back up in the following directories within the upgraded installation.
Group data
C:\Program Files\Nuix\Web Platform\Nuix-Investigate\group-config
User data
C:\Program Files\Nuix\Web Platform\Nuix-Investigate\users-config
Restart all Nuix Neo services.
Log into Nuix Investigate and then select UMS from the application selector.
Within UMS, click Sync Groups from Keycloak and verify that all groups are now visible.
After performing this migration, the following items within UMS should be checked to verify a successful migration.
Case assignments to legacy groups.
Group privileges.
Group highlight options.
Case configuration information such as folders, secured fields, and hotkeys.
See the Nuix Neo Configuration Guide for additional information on configuring your installation of Nuix Neo after upgrade.