Search case data
This section describes the general search methods that are available within the application.
Keyword search
Freeform search is the most basic and versatile type of search. Using the Keyword Search box located in the form-assisted search toolbar, locate items by entering keywords or a valid Nuix search query. As keywords are entered, a keyword search pill containing the query is created within the query staging area where it can be combined with another search filter or run as-is.
Results that match your search criteria displays in the currently selected view for further analysis. Returned search results are persisted across all views in Nuix Investigate. For more information on creating queries using the Nuix Query Language (NQL), refer to the Nuix Search Guide, available on the Nuix Customer Portal.
High performance queries
Queries that use a combination of text characters, non-text characters, and an asterisk for wildcard searches can affect system performance in large cases. Examples of such queries include the following:
* [non text character] [text characters] such as *.pdf
[text characters] [non text character] * such as text.*
Note: These types of queries are restricted due to their inherent performance implications.
The ability to run high performance queries is only available to administrators or users who belong to a group that is granted the Run High Performance Queries privilege within UMS.
When these types of queries are run from the Form-Assisted search field, a warning dialog is displayed before the query is performed.
If you have the appropriate privileges, the option to Abort or Continue the search is made available from the warning dialog. If you do not have the appropriate privileges, you cannot proceed and must enter a different search.
To stop the warning messages from being displayed, select the Do not notify me in the future check box to prevent the message from being issued with subsequent queries.
Date search
To search for items based on a specific time, click the Date filter icon located to the right of the Keyword search field to get started.
Select a timeframe from the Show Items list. The following options are available:
Show items on
Show items before
Show items after
Show items between
Choose a search focus from the by list. The following options are available:
By Item date
By last accessed
By last modified
By when file was created
Specify a date or dates, by typing in the date or selecting from the calendar.
If Show items before, Show items after, or Show items between, you can also select a time.
Click Ok to add the date query to the query staging area and then click Search.
Note: If the evidence source time zone differs from the investigator’s time zone when searching for a specific date, the dates that are displayed within the result set is time shifted to correspond with the investigators time zone. The initially specified date, however, is preserved within search history.
Immaterial items
Immaterial items are items that were extracted for forensic completeness, but do not necessarily have any intrinsic value to an investigation. They are often containers that contain other, more valuable items. The option to hide immaterial items is enabled by default. When enabled, immaterial items are excluded from the search results.
Note: The Hide Immaterial indicator shows as switched off when opened from a saved search, if Hide Immaterial is not included in the saved search.
Immaterial items include:
Folders (file system, email)
Embedded inline graphics (email signatures, embedded items from PDF files)
Embedded objects without text
Zip archives (excluding the contents of the zip)
Mailbox files (EDB, MBOX, NSF, OST, PST, STM)
Related item search
If relevant items are found when investigating a case, the likelihood of finding other items with similar or related characteristics is often high. Locating related items can help you gain a better understanding of the investigation or a piece of evidence.
The following search methods can be used to find related items based on the items currently selected within the result set in the following views:
Grid View
Gallery View
Pivot search
Comparing items within a result set using a common criterion can help identify clusters of other potentially related items. The Pivot functionality allows you to find related items based on the time or location data associated with the selected items in your result set.
To access Pivot search within a case:
Select one or more items from the result set that contain either time or location data.
Right-click within the table and select Pivot from the context menu.
Choose a pivot method:
Time: Return all items with a corresponding timestamp that is within the specified time period of the selected items.
Select Time from the Pivot menu.
Choose a metadata value to use as the Pivot Point for the selected items:
All
Item Date
Last Accessed
Last Created
Last Modified
Select a time period to pivot around or choose Custom to define a specific time.
Click Pivot.
Location: Return all items that have associated location data that is within the specified distance of the selected items.
Select Location from the Pivot menu.
Select a distance to pivot around or choose Custom to define a specific distance.
Note: A maximum allowed distance is enforced when defining a custom pivot distance. This value reflects the largest valid search radius for all selected items. If multiple items are selected, the maximum allowed distance is limited to the item with the smallest maximum radius.
Click Pivot.
The items included in the current result set are queried against the defined pivot point or locations of the selected items. All items that have corresponding metadata values that are within the defined time period or distance are shown. The results are returned in a new browser tab if the Enable New Tab Pivot Searches property is enabled. Pivot results display for only the selected items that match the pivot criteria, and the active query and associated search pills update to reflect the new result set.
Show all options
The Show All search options provide a way to filter the current result set to identify items based on their original hierarchical structure.
When evidence is ingested using the Nuix Engine, the contents of all directories, archives, and containers, otherwise known as Immaterial Items, are extracted to ensure that the complete contents of an evidence set is available for processing. Once extracted, however, Nuix Investigate presents a flat view of the data, as if there were no directory structure. The hierarchical file structure is maintained for forensic completeness but is not represented within the primary evidence views of Nuix Investigate. The Show All search options provide a method for identifying items that were previously grouped together prior to being extracted.
Tip: Performing a Show All search can be a time and resource intensive process depending on the size of the case. To improve overall performance, you should attempt to filter the number of items included within your result set as much as possible before performing a Show All search.
To access the Show All search options within a case:
Select one or more items from the result set.
Right-click within the table, select Show All Options from the context menu to see the following options:
Top level: Material items that have no material ancestors. They are the first material item in an item path. Selecting this option returns all Top-Level items that exist for the items selected, but not the selected items themselves unless they are Top-Level items.
Descendants: The child items that exist below a selected Top-Level item. Selecting this option returns all descendants that exist for the items selected, but not the selected items themselves.
Families: The combination of Top-Level ancestors and all descendant child items for a selected item. Selecting this option returns all Family level items for the items selected, but not the selected items themselves, unless they are a Family item.
Click on one of the options to show the filtered results in a new browser tab and the original search results remain in its own tab if the Enable New Tab Pivot Searches property is enabled. Several of these tabs can be opened at the same time.
Note: If you ctrl + click one of the options, it opens a passive browser tab and the focus is still on the original search results.
Tip: If your web browser is equipped with a pop-up blocker, make sure to either allow pop-ups from the Nuix Investigate URL or switch it off to ensure that the generated browser tab is not blocked.
Show in Directory Browser
Select this option to locate the parent container of the currently selected item within the Directory Browser. This option is switched off if more than one item is selected.
To access the Directory Browser:
Select one item from the result set.
Right-click within the table and select Show in Directory Browser from the context menu to open the Directory Browser.
Investigate Connections
The Investigate Connections option sends the selected items to the Investigate Connections view.
To view the selected items on the Investigate Connections canvas:
Select one or more items from the result set.
Right-click within the table and select Investigate Connections from the context menu to show the selected items on the Investigate Connections canvas.
Query Builder
All search functions within Nuix Investigate are capable of interpreting queries that have been structured using the Nuix Query Language (NQL). This syntax can be used to generate intricate queries with nuanced details, but these types of queries may be difficult to construct if not familiar with the language. The Query Builder provides an intuitive interface that allows you to take full advantage of NQL without any prior knowledge of the syntax.
To access the Query Builder, click the Query Builder  icon.
icon.
When selected, the Query Builder opens within a new window comprised of the following sections.
Query Criteria
Query Workspace
Generated Query
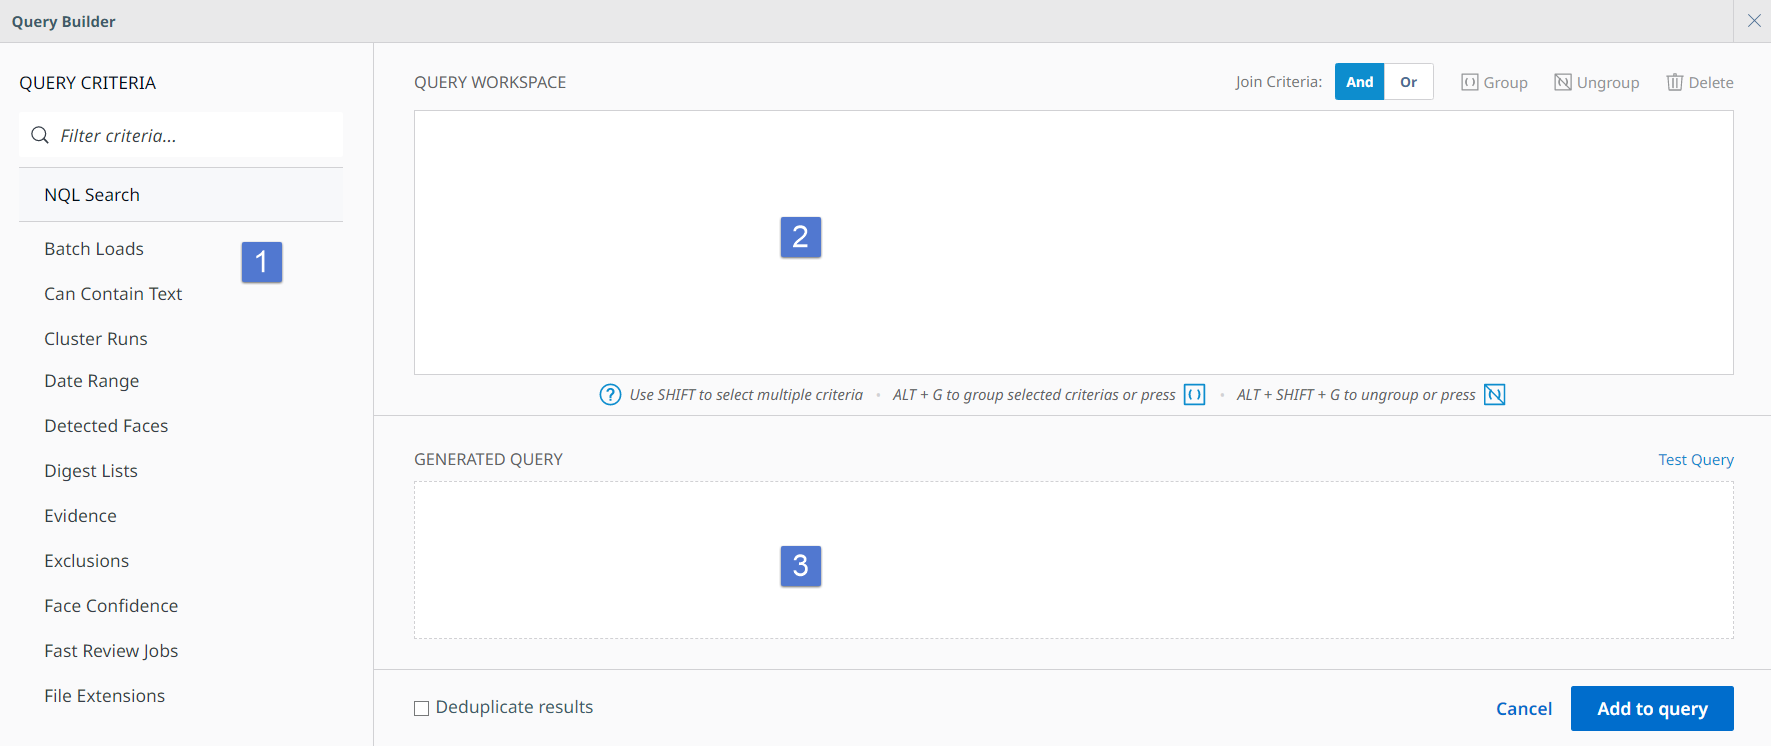
Query criteria
This section provides an alphabetized list of the available criteria that can be used to construct a query. Each criterion serves a different culling purpose and can be used in combination with any number of other criteria.
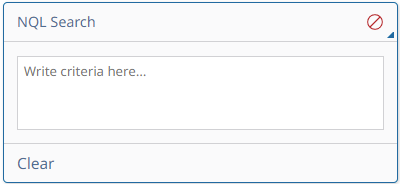
NQL Search is at the top of the list to search on a keyword or phrase using Nuix Query Language.
Type at least three letters to filter the list of criteria. Select a criterion from the list to add it to the Query Workspace. See Appendix D for descriptions of all available criteria.
Query workspace
The Query Workspace provides an area to configure and visualize the structure of the query. Criteria are added to the workspace as they are selected. Once added, a criterion can be configured, modified, deleted, or grouped together with other criteria to form a sub-query within the overall query.
Most criteria, regardless of type, require some form of configuration once added to the workspace. Criteria that have not yet been configured or are invalid for any reason are indicated with an Invalid icon. Once all configuration issues are resolved, the icon changes to indicate that the criterion is now Valid icon. The Query Builder simplifies criteria configuration by using case data to provide you with only the options that are available for each criterion at the time of configuration.
Depending on the type of criterion added to the workspace, different configuration options are available.
| Type |
Example |
Description |
| NQL Search |
|
Enter any valid NQL syntax, including keywords or phrases. |
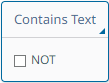
| Logical |
|
All logical criteria perform a single Boolean action identified by the criterion’s name. Select the provided check box to perform the opposite of the defined action. |
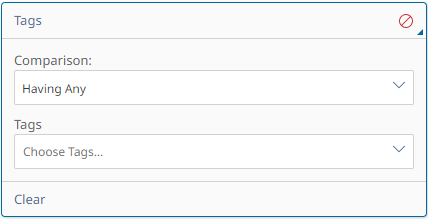
| Common |
|
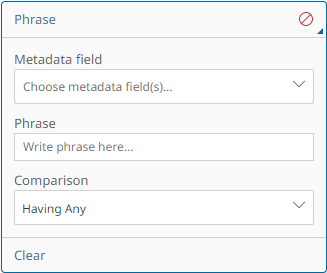
Select a comparison option to choose how the selected criteria are included in the query: Having Any: +tag:("A" OR "B") Having All: +tag:("A" AND "B") Not Having Any: -tag:("A" OR "B") Not Having All: -tag:("A" AND "B") Choose one or more options from the criterion drop-down to include in the query. |
| Other |
|
Configurations for other criteria use a combination of different types from this table. |
As criteria are added to the workspace, they are separated by a logical AND or OR operator. The AND operator is applied by default. Clicking the operator toggles it between the two available selections. To change the default selection that is applied when adding criteria, choose a different operator from the Join Criteria options located above the Query Workspace.

During construction of a query, or after all criteria have been added to the workspace, groups can be formed to create sub-queries within the main query.
To create a group within the Query Workspace:
Select a criterion from the workspace.
Press and hold the SHIFT key, then select which criteria to include in the group.
All available criteria are highlighted when the SHIFT key is pressed.
Click Group from the criteria options to form the group.
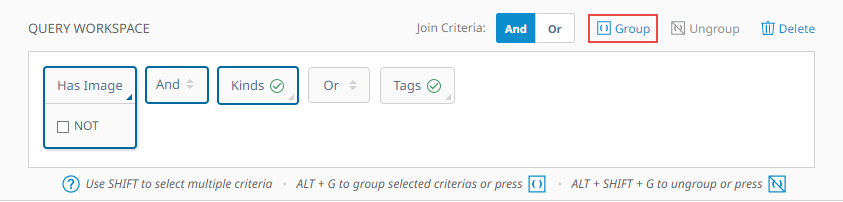
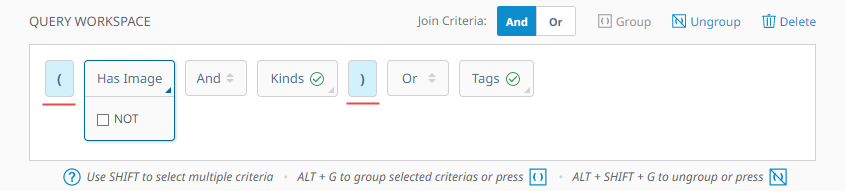
Once the group is formed, parentheses are inserted around the grouped criteria.
A query can contain any number of groups or subgroups; however, only valid groups can be created. The Query Builder prevents non-valid groups by only allowing available criteria to be selected once the SHIFT key is pressed.
To ungroup criteria:
Select the parentheses that represent a selected group or any of the criteria within it.
Click Ungroup from the criteria options located above the workspace.
To delete criteria:
Select a single criterion or group of criteria from the workspace.
Click Delete from the criteria options located above the workspace.
Generated query
As criteria are assembled and validated within the Query Workspace, the combined query, generated from the sum of all added criteria, is displayed within this section. Once all criteria included within the workspace have been properly configured and validated, the following actions can be performed.

Select Deduplicate results to exclude duplicate items from the search results.
Warning: Use deduplication sparingly, it takes a lot of memory and can be time consuming.
Click Test Query to perform a final validation of the query without leaving the Query Builder. This returns a count to the left of Test Query indicating how many valid items are responsive to the query.
Click Add to query to exit the Query Builder and add the generated query as a search pill within the query staging area.