Use Kibana with Elasticsearch
This section covers how to:
Access Kibana and view nodes and indices
Search using Kibana
Kibana, an open-source data visualization plugin for Elasticsearch, allows you to create bar, line, scatter plots, pie charts, or maps on large volumes of data, and visualize the content indexed in an Elasticsearch cluster. Kibana allows you to quickly create and share dynamic dashboards in a browser-based interface that displays changes to Elasticsearch queries in real-time, simplifying large volumes of data.
Access Kibana and view nodes and indices
Download Kibana and follow the installation procedure.
Navigate to http://[kibana network host]:[kibana port].
On a successful install, the Kibana home page opens.
From the left menu panel, select Monitoring to view your nodes and indices.
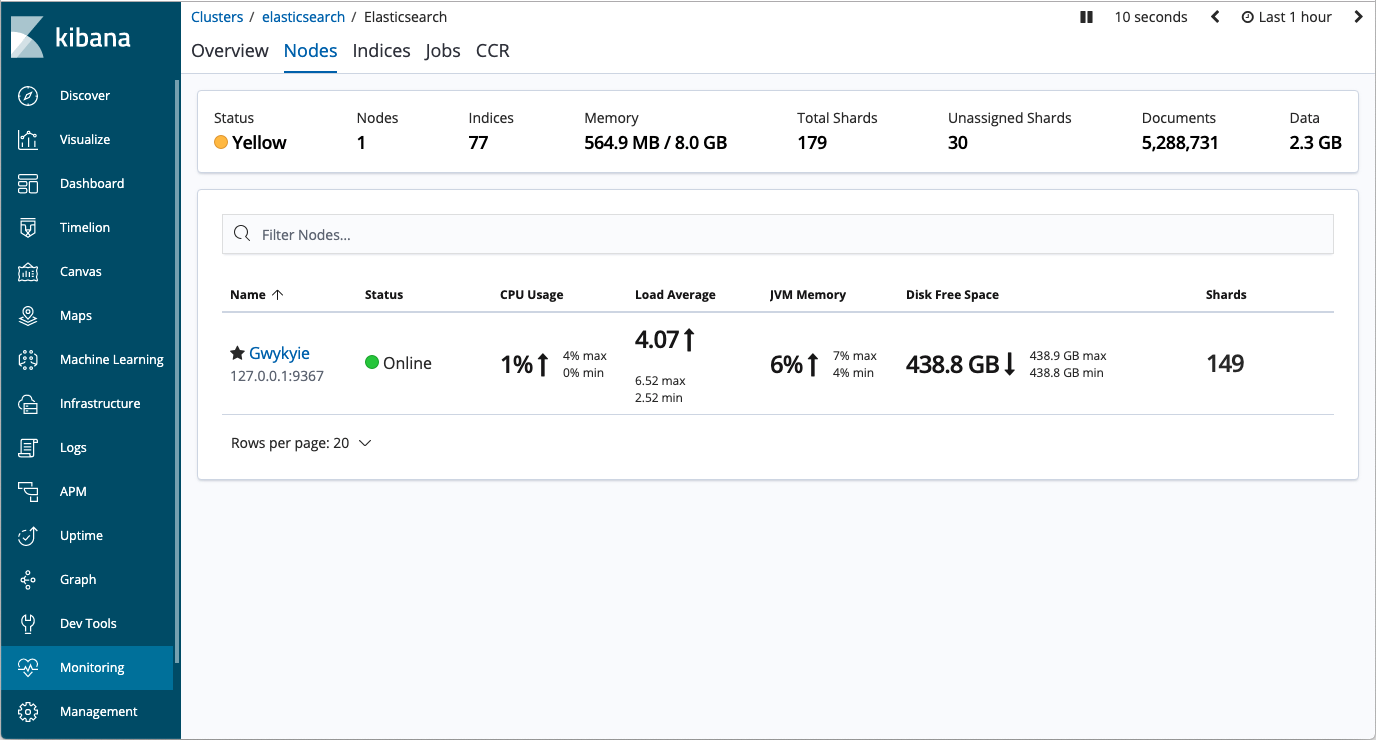
As Elasticsearch is a distributed search engine, an index is usually split into elements known as shards.
Shards are distributed across multiple nodes. Elasticsearch allows you to make one or more copies of your index's shards into replica shards, also known as replicas.
You can replicate an index with no replicas or with many replicas. You can define the number of shards and replicas per index when you create the index.
Cluster health status at shard level
At shard level, cluster health status can be one of the following:
| Cluster Health Status |
|
| Green |
Indicates that all shards are allocated. |
| Yellow |
Indicates that the primary shard is allocated but replicas are not. This is normal because the replicas are contained in a single node. |
| Red |
Indicates that the specific shard is not allocated in the cluster. In this case, go to your Elasticsearch logs to troubleshoot. |
Search using Kibana
To search using Kibana:
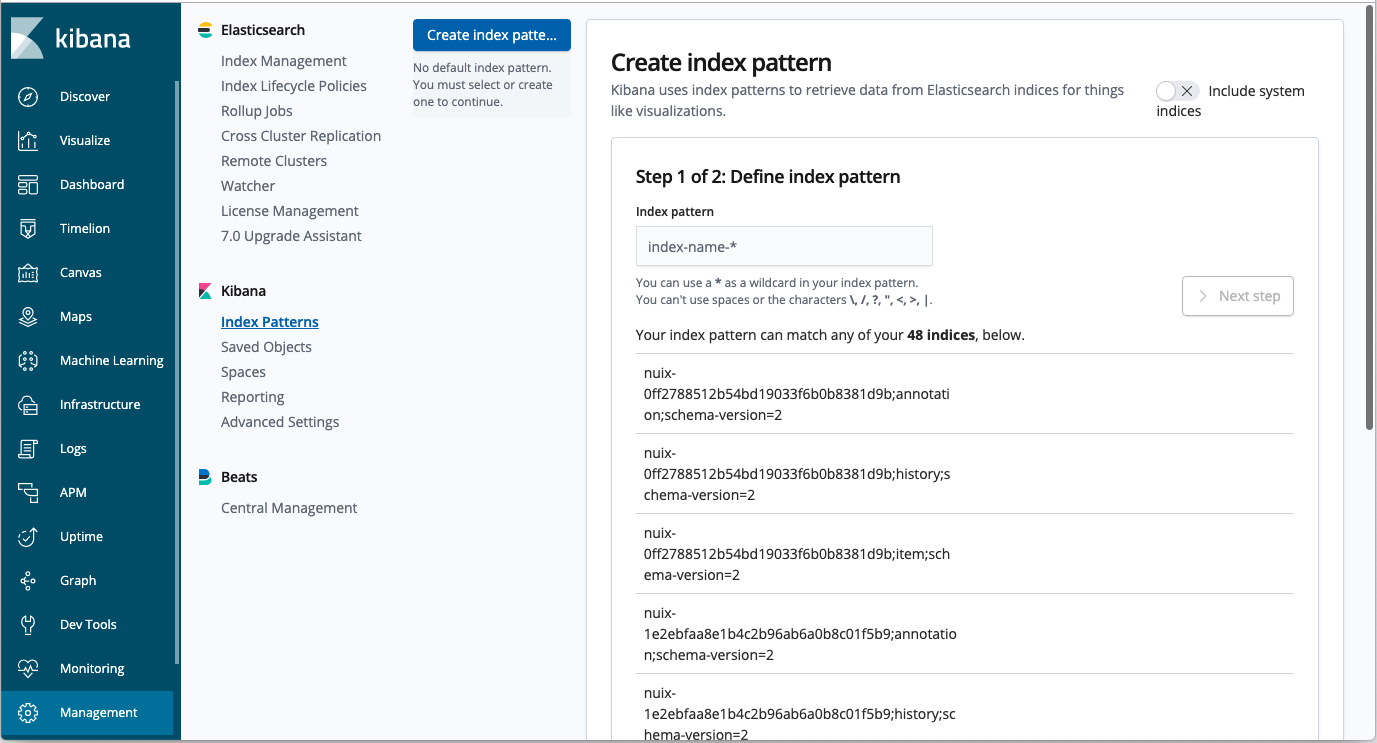
Navigate to Management and select Index Patterns.
Create an index name or pattern, nuix-case*item*.
Select I don’t want to use the Time Filter in the Time Filter option.
This creates a pattern that matches all the Nuix items across all Nuix cases.
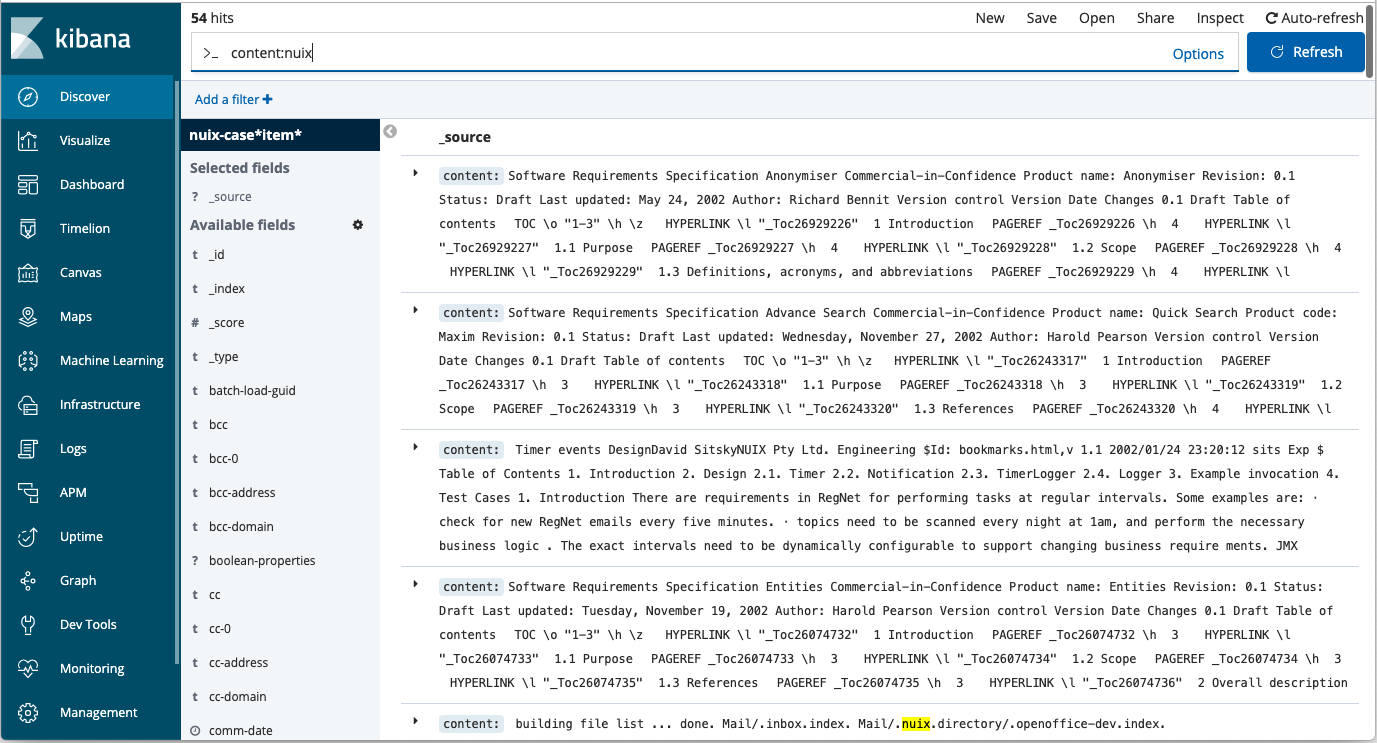
Click Discover and select the index pattern you created.
Type a search term, such as content:nuix or similar that searches the text in your Nuix case.
Click the item in the results pane to expand the item.
Note: You can change the fields to display only the GUID and then copy the list of GUIDs for use in Nuix Workstation or Nuix Investigate without creating a compound case.