Configure Nuix Workstation
This section covers how to do the following to configure Nuix Workstation:
Disable remote desktop client printer redirection
Set up distributed processing
Create shared network drives
Disable remote desktop client printer redirection
When running Nuix Workstation with a remote desktop connection (RDP), you must disable the 'client printer redirection' option to render items to PDF or TIFF. Disabling this option ensures that any printing options used in Nuix Workstation are kept local to the computer running Nuix Workstation.
Note: If you enable the 'client printer redirection' option, it impacts the quality of how items are rendered, and may not produce high quality, accurate PDF representations of Excel or Microsoft Office files.
To disable client printer redirection:
In the Run box or at the command line, type gpedit.msc to open the Local Group Policy Editor.
Navigate to Computer Configuration > Administrative Templates > Windows Components.
Then select Remote Desktop Services > Remote Desktop Session Host > Printer Redirection.
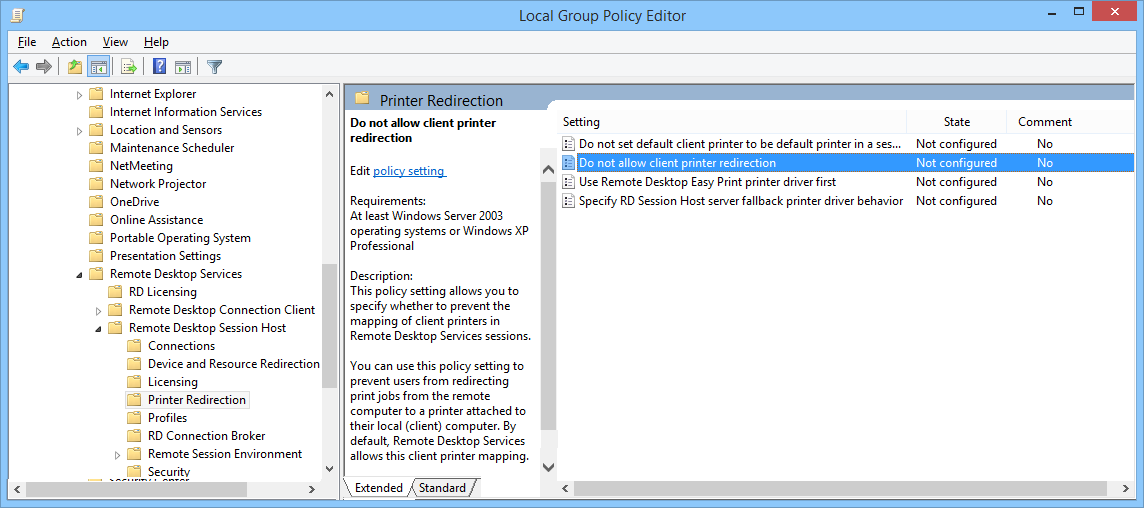
Ensure you set the Do not allow client printer redirection option to Enabled.
The Do not allow client printer redirection settings dialog box opens with the policy settings.

Select Disabled and click Apply.
Set up distributed processing
Nuix Workstation permits multiple processing workers to be connected together to form a single distributed processing engine. To set up a distributed processing framework, see the Nuix Workstation Guide to Configuring Distributed Workers.
Create shared network drives
When running Nuix Workstation in a distributed environment, all of the Nuix resources need access to both the source evidence and the master case directory through shared network drives.
You need to create drives for both the source evidence and the case directory, both of which can be accessed via a common drive mapping (all resources must be accessible using the exact same drive mapping) or via a Universal Naming Convention (UNC) path.
To create shared network drives:
Create a shared drive for holding your source evidence.
Locate it on a common network-accessible disk resource that contains all of the evidence.
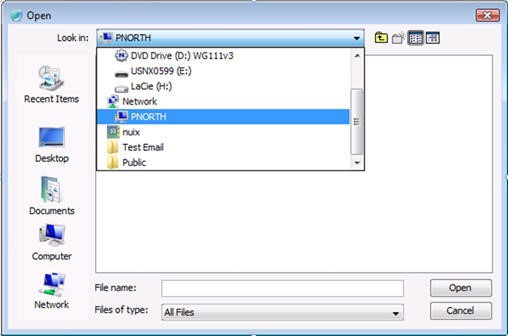
When declaring the UNC path, enter the entire UNC path in the File Name field, or browse to it using the Look in control.
Create a shared drive for holding the case directory.
Ensure a common disk resource is available for it. This is typically a storage area local to the Nuix Master processing machine that is presented as a share to the other machines running the task.
When declaring the UNC path, enter the entire UNC path in the File Name field, or browse it using the Look in control.