Nuix Adaptive Security installation
This section discusses topics related to the installation of Nuix Adaptive Security.
Default port configuration
Nuix Adaptive Security uses the ports described in the following table.
| Component |
Port |
| Nuix Adaptive Security endpoint server |
6443 for agent connections, as defined in the endpoint server’s config file. |
| Nuix Adaptive Security API server |
443 |
| Service Directory microservice |
5002 |
| Identity microservice |
5003 |
| Adaptive API service |
5004 |
| Audit service |
5005 |
| Console (localhost only) |
8500 |
Note: Ports 5002 and 5003 are opened automatically during the installation process.
Change the server-agent communication port
You may need to change the default server-agent port if the network firewall cannot be changed to allow communications on the default port. You may also wish to change the port to use a more common port to conceal server-agent communications.
NUIEXPS will start and then quickly stop if the assigned a port is in use by another service.
To confirm agent-server communication on a particular port is possible, you can use Telnet.
To confirm agent-server communication use on a specific port:
Turn on a Telnet client on the target endpoint.
From an elevated command prompt on the endpoint, run the following command:
telnet [server IP address] [port]
If the command prompt window changes to Telnet, a connection is possible.
To change the server-agent communication port:
Confirm the server's current listen port. Run netstat -ano | find "6443" and confirm you see an entry like the following:
Proto: TCP
Local Address: 0.0.0.0:6443
Foreign Address: 0.0.0.0
State: Listening
PID: [PID for NUIXEPS]
Locate the configuration file for the endpoint server service (NUIXEPS) at C:\Program Files\Nuix\Adaptive Security\Endpoint Server\Data\config.txt
Change "ServerPublicPort" to the desired port, such as 8080. This changes the database for the configuration with that port setting.
Change "ListenPort" to the desired port, such as 8080. This changes the NUIXEPS service's listen port]
Save the config.txt file.
Restart NUIXEPS from Task Manager > Services.
Run netstat -ano | find "[port#]" to confirm NUIXEPS is listening on the new port.
In the Nuix Adaptive Security application, create a configuration, for example "InitialConnection8080".
Confirm the port is correct in the server setting.
Download an agent with the new configuration.
Install the agent on the endpoint.
Server installer password requirements
The minimum password requirements include:
16 character length
1 uppercase character
1 number
Nuix Adaptive Security endpoint server
Note: This example assumes that this is the first installation of Nuix Adaptive Security.
Use the following procedure to install the endpoint server component of Nuix Adaptive Security.
The endpoint server creates two sets of certificates for the server to communicate with the agents. It is important to create a backup of the certificates, see Backing up agent certificates in the Nuix Adaptive Security Administration Guide.
Note: If Internet Information Services (IIS) is installed, uninstall IIS before proceeding with your installation. If IIS is installed with some options, it will cause issues.
Warning: Before the installation of the Nuix Adaptive Security endpoint server, MySQL 8.0.x.x .msi or later must be installed on the server. All previous versions of MySQL must be uninstalled before installing the latest version.
Before getting started, extract the installer files from the .zip file by entering the password in the following format NASvXXXXXX.
To install the Nuix Adaptive Security endpoint server:
Right-click Nuix.Adaptive.Security.Installer.exe and click Run as administrator.
Note: During a clean installation, the installer checks for the availability of the following ports: 443, 5002, 5003, 5004, 6443, and 8500. If all of these ports are not available, the installation fails to proceed. Modify your firewall if necessary, to access these ports.
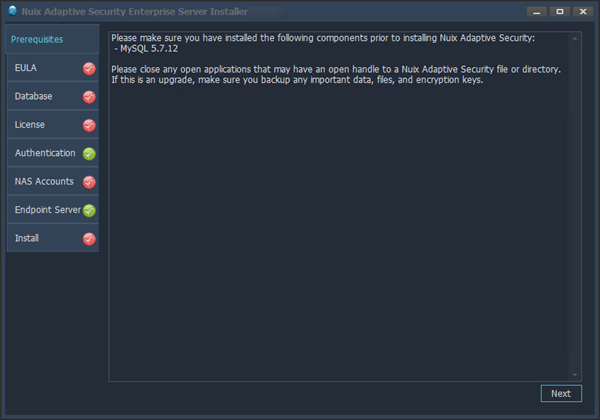
In the Prerequisites window, verify that the prerequisites, shown in the following image, are listed as installed.
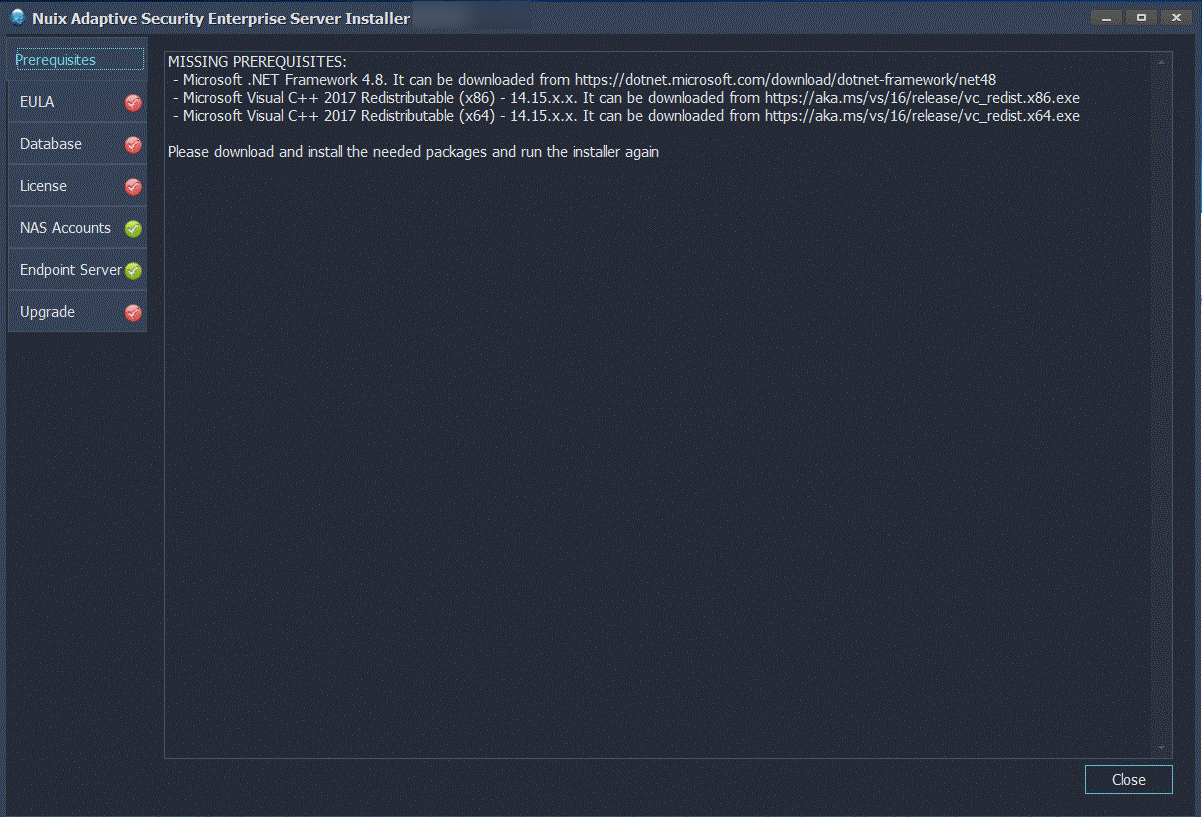
If the prerequisites are missing, the window will look similar to the following image.
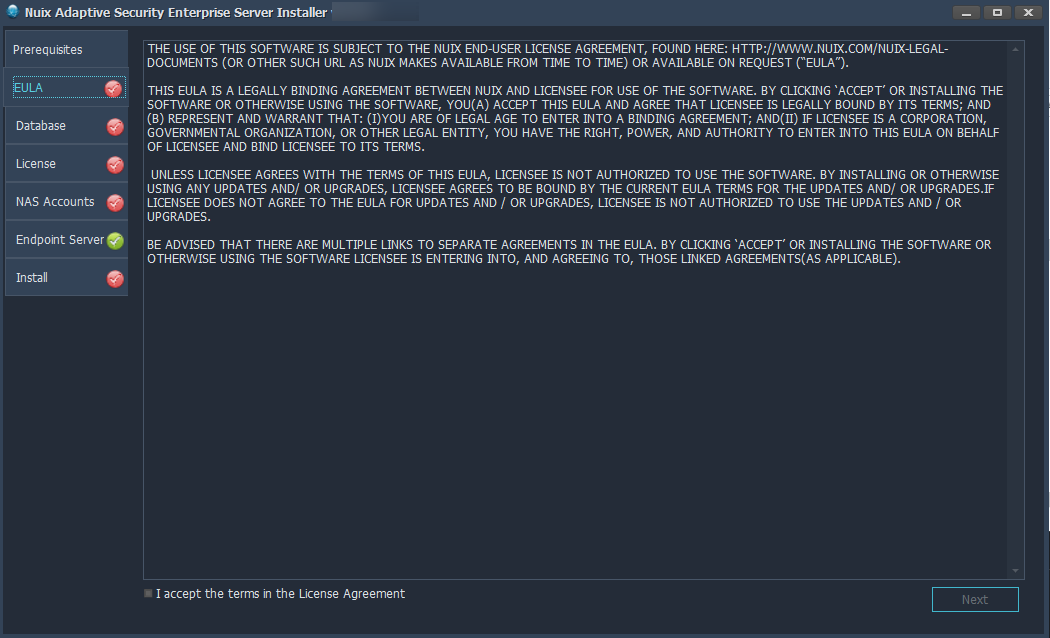
In the EULA window, read the Nuix Adaptive Security license agreement, select the check box next to I accept the terms in the License Agreement, and click the Next button, as shown in the following image.
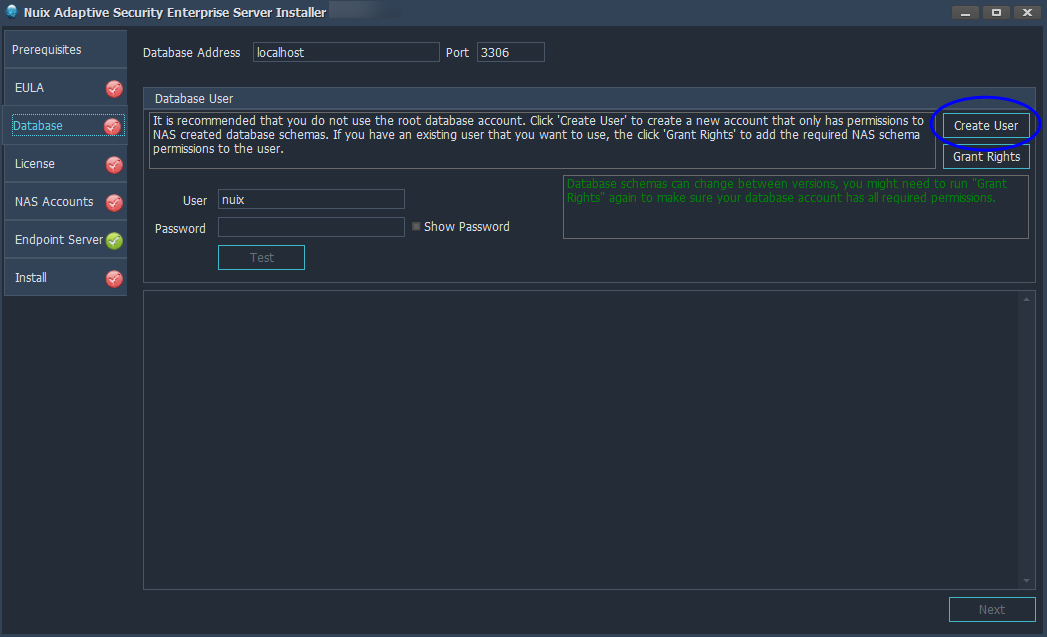
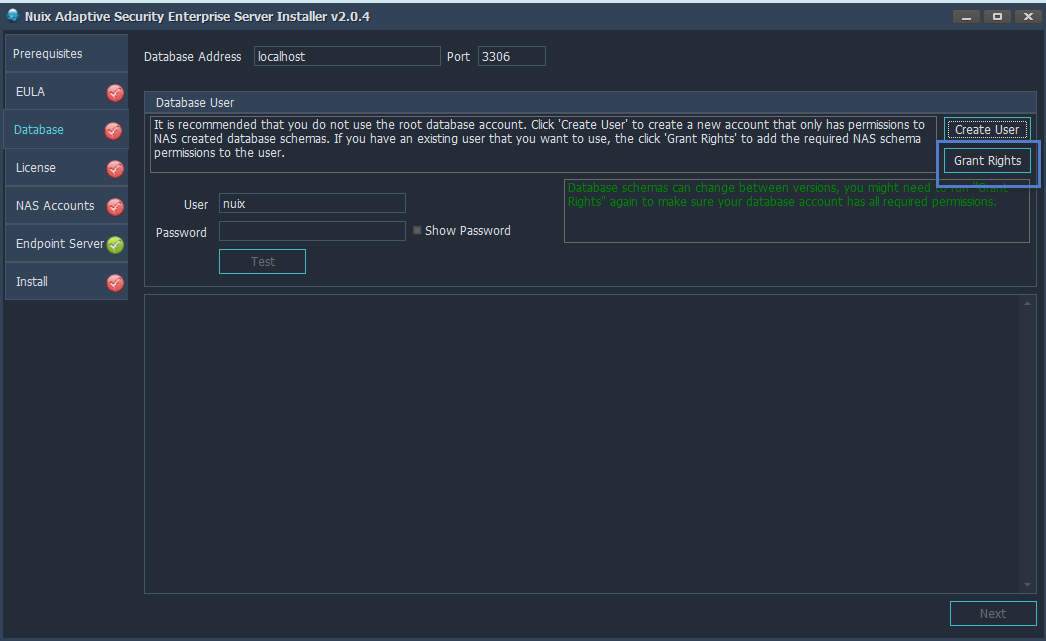
In the Database window, if you are creating a new database account for Nuix Adaptive Security, click the Create User button, as shown in the blue circle in the following image. If you are using an existing database user account, skip to step 6.
Warning: do not use the root database account for integration with Nuix Adaptive Security.
(Optional) Use the following procedure to create a user in the Create New Database User dialog box.
Enter the database IP address and port.
Note: The localhost can be used if the database is installed locally.
If you are using MySQL 8, browse to select the Certification Authority (CA). You can find the CA.pem file in the default location, C:\ProgramData\MySQL\MySQL Server 8.0\Data or the data directory for your custom configuration.
Enter the superuser credentials. This must be an account with root-level privileges.
Enter the new database user name and password.
Note: Do not use the following characters in a password: ' (apostrophe), | (vertical bar), = (equals symbol), " (quotation marks), and ; (semicolon).
Click the Create User button, as shown in the following image. The box underneath the password boxes shows the progress of the user creation, and any errors that occur.
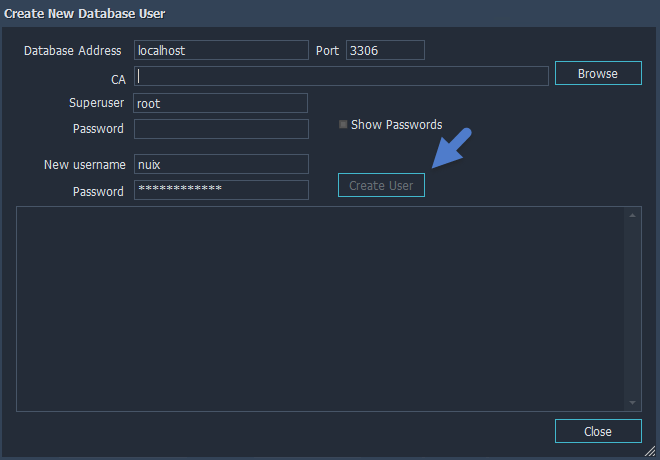
Click Close once the user creation is successful.
To use an existing database user account, click the Grant Rights button. If you created a new account in the previous steps, skip to Step 7.
In the Grant Rights to User dialog box, enter the root credentials and new username created previously.
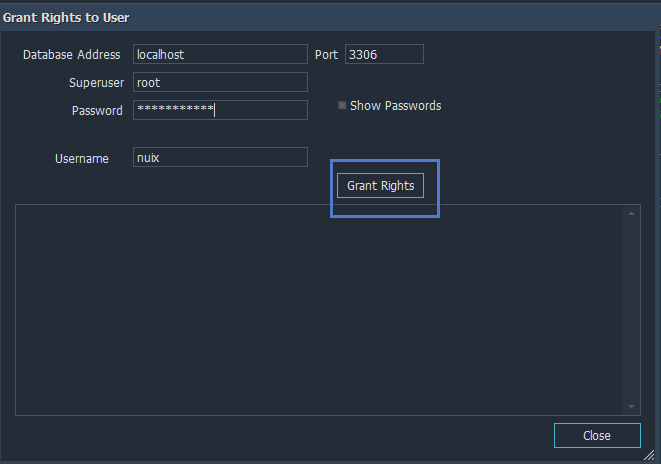
Click the Grant Rights button. If there are no errors, click Close.
To continue this installation, click Next.
Note: For questions or assistance obtaining a license, contact your sales representative or contact Nuix Support at https://nuix.service-now.com/support.
In the License window, use the following procedure to add the required license file.
Click the Copy button next to the Hardware Key.
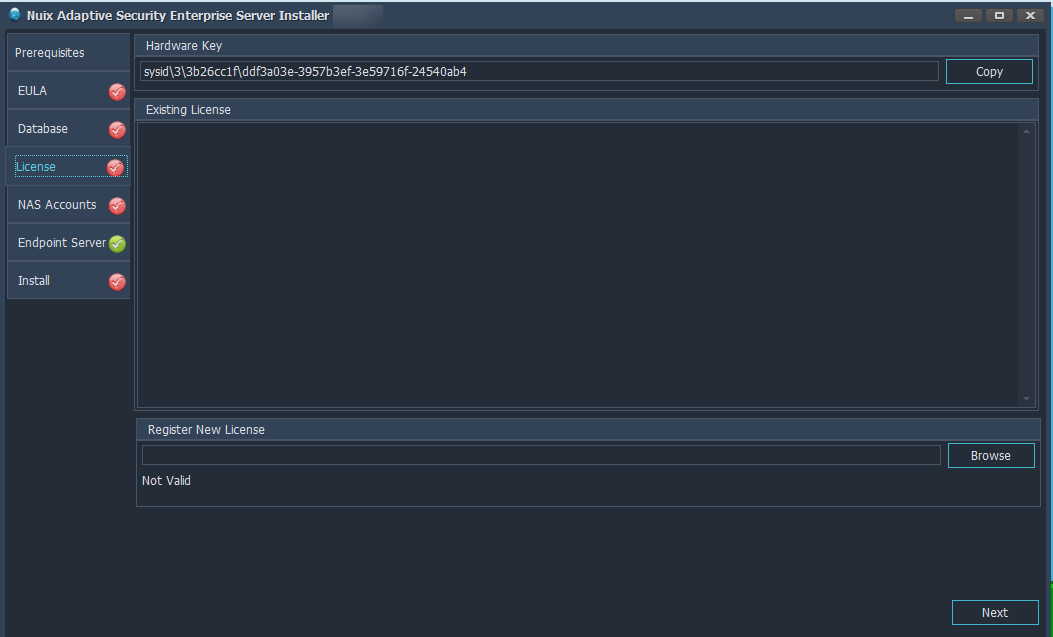
Log into the Nuix Portal.
Click Dongles to obtain a new license or to extend an existing one. Paste the key to search for any existing licenses. After providing some basic information, select the file to download.
Note: To add a license after installation, see the Nuix Adaptive Security Administration Guide.
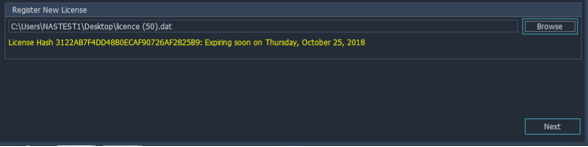
In the Register New License section of the license window, click Browse to navigate to the license.dat file. If the license is valid, the license’s information, including the expiration date, appears. If the license is about to expire, the information is highlighted in yellow, as shown in the following image. Click Next to proceed.
Note: If you do not have a license file, you can skip this step and add it later.
Select the Server Role as primary or secondary and enter the server name and a brief description.
(Optional) Set up the Federated Authentication. For details on federated authentication, see Setting up the Server Installer in the Federated Authentication section.
When federated authentication is enabled, you can not set up local NAS accounts. The NAS Accounts option is inactive and greyed out.
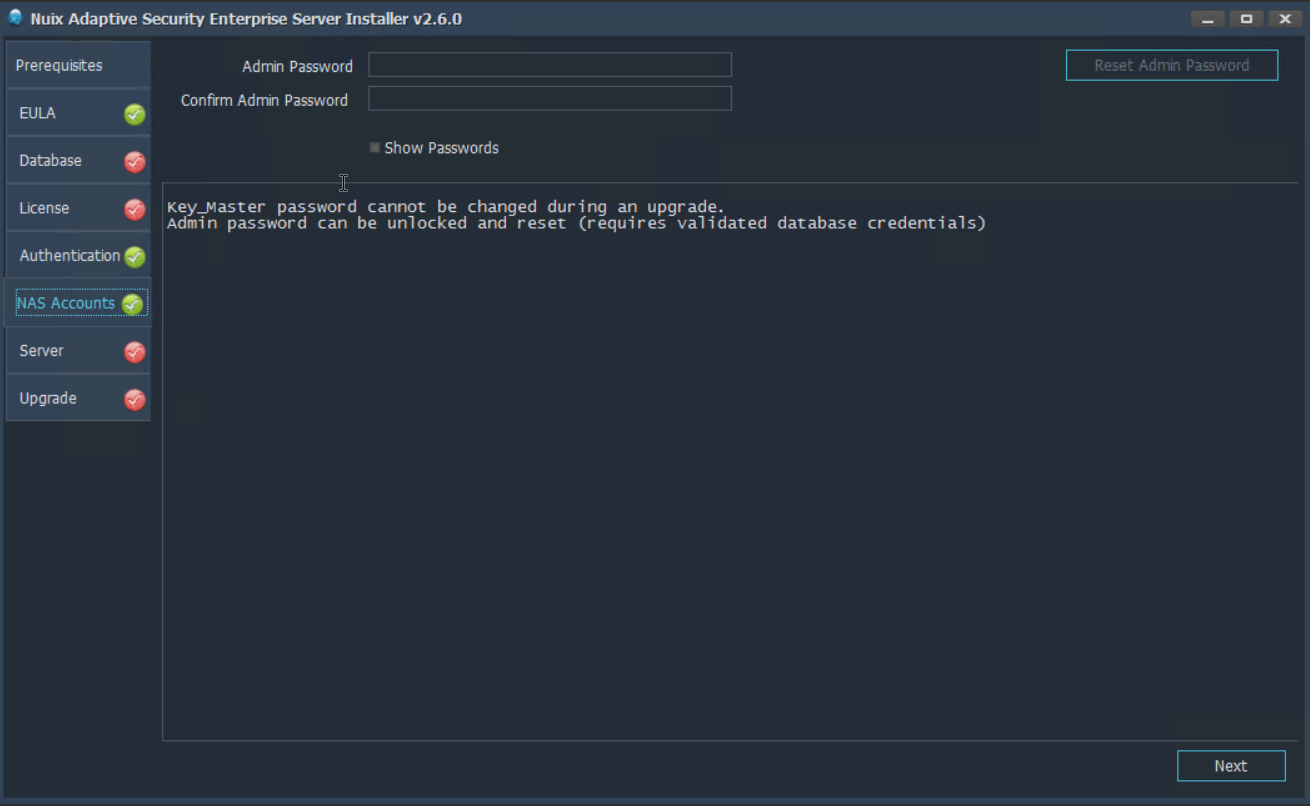
In the NAS Accounts window, enter the Admin password, as shown in the following image. Click Next when finished.
Note: Store the Admin password in a safe place.
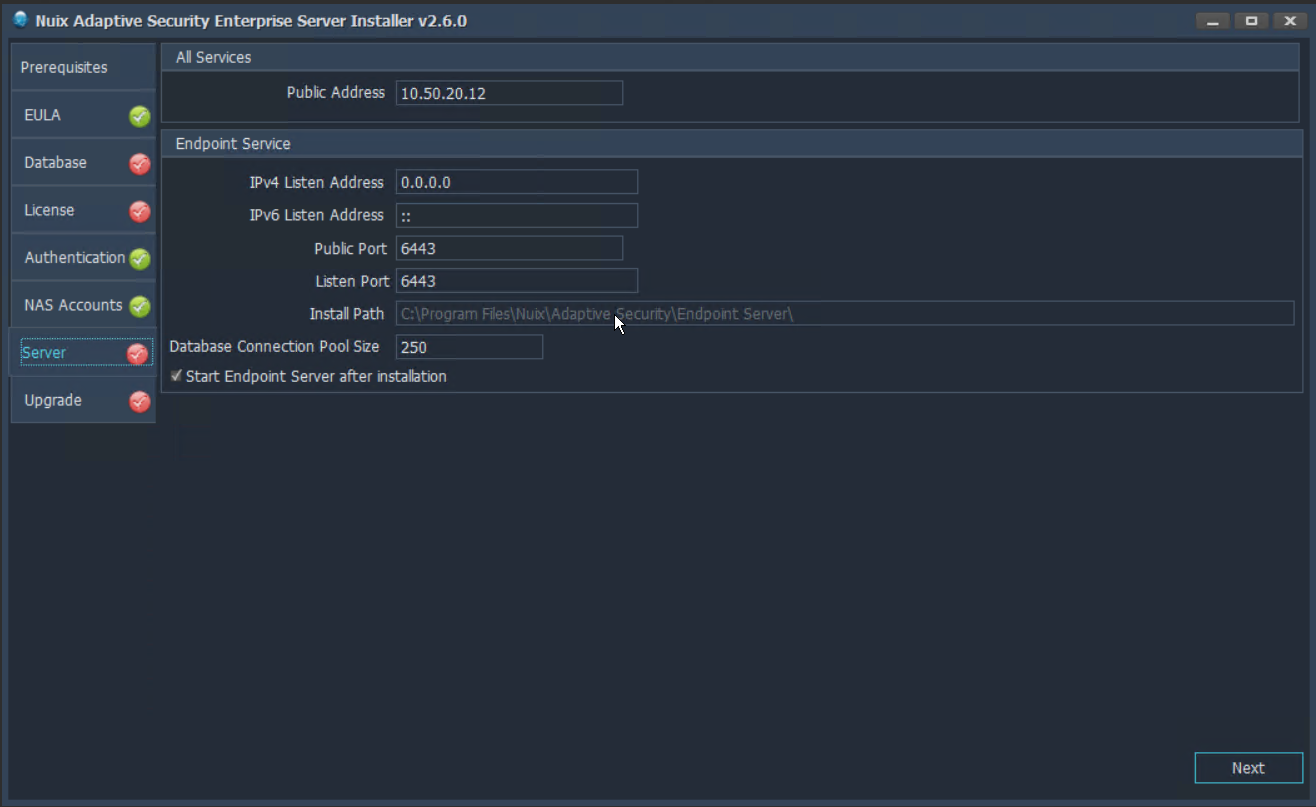
In the Server window, accept the default configuration settings. The software will open after the installation is complete. Click Next to start the installation.
Note: If the server has both internal and external IP addresses, use the external IP address. The external IP address is the default server address when creating agent configuration. The external IP address is also the default address for the Web UI.
Note: During the installation of Nuix Adaptive Security on Windows Server 2016, errors that look like the following ones may appear in the install log: Error: 0x800f081f and Error: 0x800f080c. The installation should occur without issue. These benign issues have no impact on your installation of Nuix Adaptive Security.
In the Install window, click Install. The installation process takes a few minutes. Once the process is complete, the Install button changes to Exit. Click Exit to open Nuix Adaptive Security.

Note: When doing an upgrade of Nuix Adaptive Security, if the following error occurs, and appears on the screen: Step 13: Install Site Failed. Retry the installation with the Nuix Adaptive Security application and the Adaptive Security configuration closed. This should allow the upgrade to finish.