Managing users and roles
Additional user accounts can be added to ECC. If your ECC Server is configured to manage its own user accounts (the default setting), you can manage users and their roles using the following procedure.
Note: If your ECC Server is configured to utilize a Keycloak server for user authentication, you'll need to manage ECC users via Keycloak. For details see the topic Keycloak Configuration in the ECC Administration Guide.
To add a user account on a particular server:
Launch the ECC Administration Console program. The Log in dialog appears.
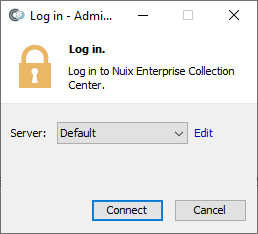
Note: You can change the Default ECC Server settings, or configure additional ECC Servers, via the blue Edit link on the Log in dialog.
Select an ECC Server from the Server list, then click Connect.
Specify an existing ECC Username and Password for the selected ECC Server.
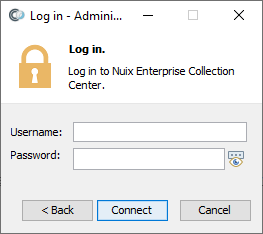
If the ECC Server is integrated with a Keycloak authentication server, and if multi-factor authentication is enabled for the user, then a web browser will appear and prompt for a one-time password.
Note: One-time passwords can be retrieved with an authenticator app such as Google Authenticator or FreeOTP, available for iPhones and Android mobile devices, as well as the WinOTP application for Windows 10 computers.
Click OK to log in to Administration Console with a connection to the selected ECC Server.
The Administration Console Dashboard screen appears:

Click the  button near the upper-right corner of the screen to access the menu, then select Users and Roles.
Note: The Users and Roles menu option will not appear if you are logged in with a user account which lacks the Manage Users and Roles permission, or if the ECC Server is configured to use Keycloak for authentication.
The User List Maintenance dialog displays:
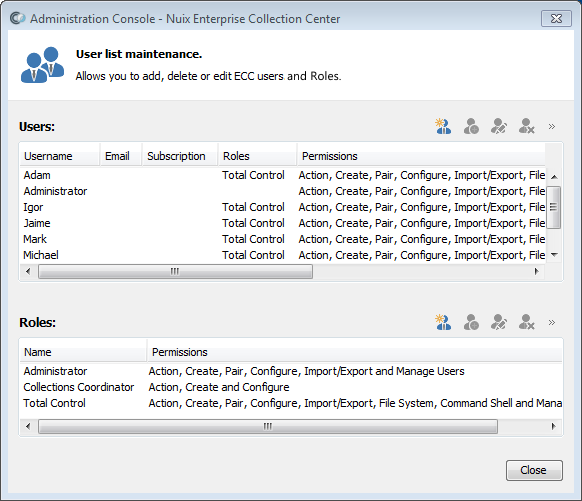
Note: The User List Maintenance dialog lists Administration Console User Accounts (ECC User Accounts) present on the ECC Server you are currently connected to. These accounts are used for logging in to Administration Console only.
The User List Maintenance dialog can only be shown by an ECC user having the Manage users and roles permission.
Review the list of Roles at the bottom of the User list maintenance dialog, to ensure there is a role suitable for the user you are about to add. If you need to create a new role, click the New Role button in the lower half of the dialog, then give the role a name and specify the permissions associated with this Role. Click OK to save the new Role, which will appear under Roles in the User list maintenance dialog.
Users on the current ECC Server can be added, edited or deleted using the New User, Edit User, and Delete User buttons. To add a new ECC user, click the New User button in the upper half of the User list maintenance dialog. The User Details dialog appears:
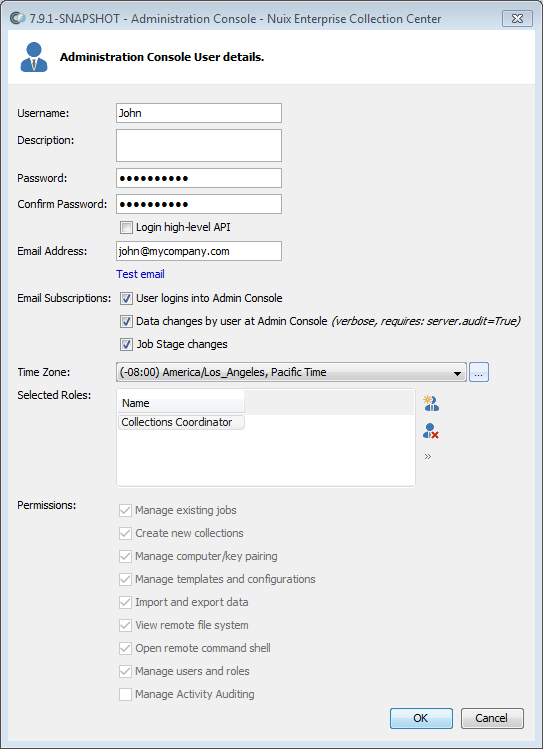
Fill out or edit the values for the user, as follows:
| Value |
Description |
| Username |
The username for this user, which will be entered at the Admin Console login screen. |
| Description |
A description of this user. Can be the user's full name and/or job title. |
| Password |
The password for this user account. |
| Notes:When changing the password for the user who you are currently logged in as, be sure to make note the new password, or else you may not be able to log back in to ECC Administration Console again. Specifying a strong password is recommended. Strong passwords contain at least 9 characters, avoid common words, and include a combination of upper and lowercase letters, numbers and symbols. When editing an existing user, the previous password is hidden from view. Leave the two Password fields unaltered to retain the prior password. |
|
| Warning: Leaving any user without a password leaves your ECC system vulnerable to unauthorized access. |
|
| Login high-level API |
If enabled, this user account can be used for authentication via REST (e.g. from other Nuix applications). |
| Email Address |
The email address for this user. ECC email notifications will be sent to this address, provided – The Diagnostic Auditing and Notifications setting is enabled (discussed in topic Server Properties in the ECC Administration Guide.) An SMTP server is properly configured – discussed in topic Server Properties for Email (SMTP) within the ECC Administration Guide. The user has subscribed to one or more email subscriptions (see below) |
| Email Subscriptions |
The ECC Server can send various kinds of email notifications to this user whenever certain activities occur. This user can "subscribe" to these notifications by checking one or more of the following options: |
| User logins into Admin Console |
When selected, receive an email notification whenever any ECC user logs into the system via Admin Console. |
| Data changes by user at Admin Console |
When selected, receive an email notification for any user-initiated changes via Admin Console. |
| Job Stage changes |
When selected, receive an email notification for each ECC collection or job, as the job goes through various stages. This includes job started, job completed, job cancelled, job failed and other stages. |
| Time Zone |
The local time zone for this user. This is necessary to ensure jobs are scheduled at the expected time and date. |
| Selected Roles |
One or more Roles associated with this user. Each role defines a set of permissions, shown below. Roles can be created and managed from the bottom of the User list maintenance dialog. |
| Note: If permissions are changed for a role, any user having that role must log out of Admin Console and log back in for the changes to take effect. |
|
| Permissions |
A set of permissions for this user, described below. These permissions are not directly editable. They reflect the cumulative permissions of the Selected Roles for this user. The initial Administrator user is assigned all permissions except View remote file system, Open remote command shell and Manage Activity Auditing. In a production environment, administrative accounts may be granted all these permissions. |
| Note: User who lack certain permissions will not see the corresponding options on the menu accessed via the |
|
| Manage existing Jobs |
When enabled, this user is granted permission to act on existing jobs, such as pausing or cancelling a job. |
| Create new collections |
When enabled, this user is granted permission to create new collection jobs. |
| Manage computer/key pairing |
When enabled, this user is granted permission to activate newly registered ECC Client computers and ECC Admin Console computers, by "pairing" them with an activation key. |
| Manage templates and configurations |
When enabled, this user is granted permission to configure collection templates and collection configurations. These are both ways to save collection settings for repeated use. |
| Import and export data |
When enabled, this user is granted permission to import or export records into ECC. This can include target details, groups and other kinds of records shown in ECC Admin Console. |
| View remote file system |
When enabled, this user is granted permission to browse the file system of ECC Client computers. For details see topic Browsing a File System. |
| Open remote command shell |
When enabled, this user is granted permission to open a remote command shell on ECC Client computers. For details see topic Issuing Commands via Remote Terminal. |
| Manage users and roles |
When selected, this user is granted permission to view, add, update or delete ECC users and roles. |
| Warning: Any user with Manage users and roles permission can edit their own user account and grant themselves all other permissions. They can also add or edit all other user accounts. So this permission should be granted only to users who require complete access to ECC. |
|
| Note: A user cannot remove their own Manage users and roles permission. They must log out of Admin Console, then log back in under a different account before they can remove this permission from their original user account. |
 button. Users who lack all the following permissions will still be able to log in to ECC via Admin Console to view ECC activities.
Click OK to save changes.
Tip: Give all ECC Administration Console users strong passwords, at least 8 characters in length, using mixed upper and lowercase letters, numbers and punctuation. Use stronger password criteria if your organization's policies warrant.