Keycloak configuration
After installing all Nuix shared services, the Keycloak service must be configured.
Before you begin:
Download the Keycloak Client Import files that available from the Nuix Shared Services download page. These files provide the configurations that are required for Keycloak to integrate with Nuix Neo.
Nuix Web Applications client import file (Required)
ECC client import file (Required if installing ECC)
Access Keycloak:
Access the Keycloak Admin Console page using the desktop shortcut, or directly from a browser using the host and port that were configured during installation.
http://localhost:8080/
Note: If the admin console is not accessible, ensure that the Keycloak service is running:
Enter the following command into a command prompt with elevated privileges to start the service:
net start Nuix-Keycloak
Enter a username and password for the initial Keycloak admin account, then click Create.
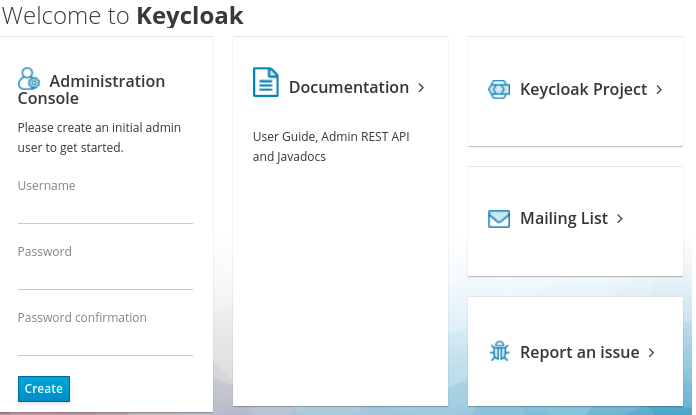
Once a user is successfully created, click Administration Console and enter the credentials for the newly created admin user when prompted.
Import Nuix client files
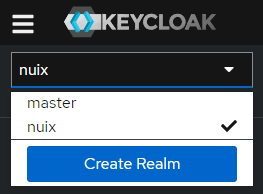
The Keycloak Admin Console includes two default realms:
Master realm
Nuix realm
A realm is an area where a logical collection of users, credentials, roles, and groups can be managed. The master realm is for managing the Nuix Keycloak service. The Nuix realm is for managing the applications that make up Nuix Neo.
By default, the Nuix realm is not installed with any client configuration details. These details are added using a client import file that will install all required configurations for the Nuix Neo client.
To import Nuix Neo client configuration details into Keycloak:
Expand the realm menu from within the Keycloak Admin Console and select Nuix from the list.
From the sidebar, select Realm settings then select Partial import from the Action menu.
On the Partial import screen, click Browse and navigate to the client import file previously downloaded.
nuix-web-apps-keycloak-client.<version>.json
Click Open to select the file.
Select all of the available resources to import and select to Fail import if a resource already exists.
Click Import, then click Close after the import has completed.

Define valid redirect URIs
For enhanced security and to prevent unauthorized redirects, specify any fully qualified domain names and IP addresses that will be used to access Nuix Neo components.
To define a valid redirect URI:
From the sidebar of the Nuix realm, navigate to Clients and select nuix-web-apps from the client list.
Locate the Valid redirect URIs field and add any additional valid redirects that will be used.
Valid redirect URIs represent the URLs that are accessed from a client browser.
For example: http://companyName.Nuix.com/* or https://companyName.Nuix.com/*
Click Save.
Keycloak client secret
The Keycloak client secret is required during the installation of Nuix Neo.
To retrieve your Keycloak client secret:
From the sidebar of the Nuix realm, navigate to Clients and select nuix-web-apps from the client list.
Select the Credentials tab and copy the Client secret.
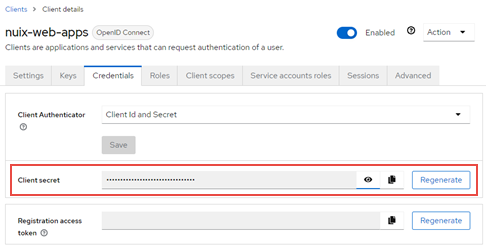
Important: The client secret is required later during the Nuix Neo installation process.
Create a Nuix client admin user
For Nuix Neo to have access to Keycloak, an admin user must be created. This user will be used to access the Nuix Configuration Utility to perform the initial setup.
To create a Nuix client admin user:
From the sidebar of the Nuix realm, navigate to Users and then click Create new user.
Enter a Username and click Create.
On the User details page, select the Credentials tab.
Click Set password.
Enter a strong password and set the Temporary switch to Off.
Click Save.
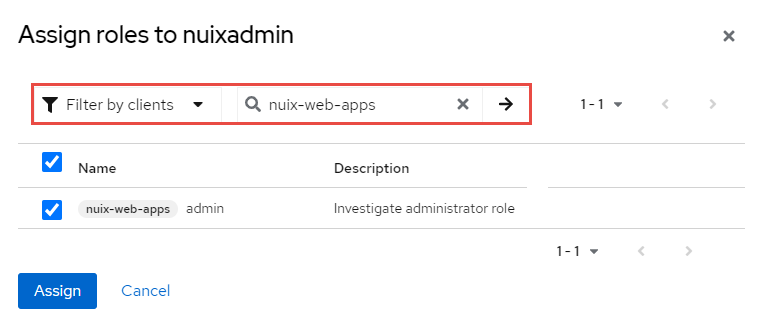
Select the Role mapping tab then click Assign role to grant privileges to the new user.
Expand the Filter menu and select Filter by clients. Next enter nuix-web-apps into the search field.
Select the nuix-web-apps option, then click Assign.
admin: Grants administrative access to Nuix Investigate.
Add certificate to Java Runtime Environment (JRE)
If you choose to enable SSL security during the Nuix Neo installation process, and the certificate used during the shared services installation to secure the Nuix Keycloak service was derived from an unknown trusted root, issues may be encountered during the Nuix Neo installation process when attempting to validate the Keycloak Nuix realm URL.
To avoid this, add the certificate used to secure the Nuix Keycloak service to the JRE cacerts file that is installed on the host where Nuix Neo will be installed.
Open a command prompt as an administrator on the host where Nuix Neo will be installed.
Navigate to the bin directory within the JRE installation:
cd C:\Program Files\Common Files\i4j_jres\<ID>\<jre_version>\bin
Enter and run the following command to import your PEM certificate into the JRE cacerts file.
keytool -import -file C:\path\to\PEM.crt -cacerts
Provide the cacerts keystore password when prompted. The default password is changeit.
Enter Yes when prompted to trust this certificate.