Export data to generate a legal load file
To export data to generate a legal load file:
Select the items in the result set you want to export.
In the Results pane, select Export then Legal Export to and select the required legal application (eDiscovery program). Alternatively, select these options from the File menu or when you right-click on items in the Results pane.
All methods open the Legal Export dialog, with various settings over four tabs.
Complete details in each of the following tabs:
On the Export Type tab, specify properties for the type of export you want to perform. See the following Export Type tab details subsection for full details.
On the Load File Settings tab, specify the additional settings to export to your chosen load file format. See the following Load File Settings tab details subsection for full details.
On the Numbering and Files tab, configure document numbering and file names in the legal load file. See the following Numbering and Files tab details subsection for full details.
On the Parallel Processing tab, to tune the performance of the export operation, review the defaults and, if necessary, adjust the number of Nuix Worker machines and allocated memory.
See the following Parallel Processing tab details subsection for full details.
When you complete setting up the export job, click OK.
The Exporting Items dialog box opens to indicate the progress of the export operation, showing a real-time count of items as they are exported.
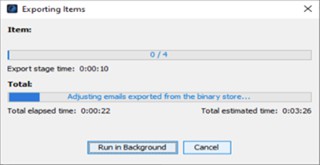
On completion of the export, click OK to close the Exporting Items dialog.
See Review legal export output files further down in this section for details about what kind of files are produced on completion of a legal export.
Export Type tab details
On the Export tab of the Legal Export dialog, complete details in the following sections:
'Files to export' section
| Field |
Action |
| Export Items |
Select one of the following options to determine how you want to export the items: Selected items only: To export only the selected items (and not deduplicate or export the entire family). If an attachment to an email is part of the result set, only the attachment is exported, not the parent email. Selected items and descendants: To export only the selected items and any descendant items. This is most frequently used when you manually find the top-level items and specifically tailor the exact contents of the result set. Top-level items only: To identify the top-level item for each item in the result set, and export them; and export duplicate top-level items, if present, as separate items. Top-level items and descendants: (Default) To identify the top-level item for each item in the result set, and export those items and their descendants; and export duplicate top-level items, if present, as separate items. Note: Top-level options result in the export reporting a different number of items than those selected in the result set. This is because, in the result set Nuix Workstation finds all the top-level items, and then optionally deduplicates the exported set. To reconcile the item counts, review the Pre-export Summary Report as well as the Post-export Summary Report. Export descendant containers: To export emails with zipped attachments. Clear this check box to export emails with their unzipped contents. |
| Top-level deduplication |
Select one of the following options to determine how you want to duplicate the export set: None: To export all items, where the resulting exported set may contain duplicates. MD5: (Default) To deduplicate all top-level items before exporting the results, ensuring that a single copy of each logical, top-level item and its family is exported. MD5 per custodian: To deduplicate the top-level items for each named custodian before exporting the results. This ensures that a single copy of each logical, top-level item and its family is exported for each custodian, but the resulting exported set may contain duplicates across custodians. |
| Sort Order |
Select one of the following options to determine the order in which the items are to be exported: Position sort order (fastest): To export the selected items based on their position. Note: This is also known as Family-level Sort Order. It is the fastest method because it does not require additional sorting. This is recommended if you are importing the data into another review tool with its own sorting capabilities. Top-level item date (ascending): To export the selected items based on the date of the top- level document, with the oldest listing first in the load file. Top-level item date (descending): To export the selected items based on the date of the top- level document, with the latest listing first in the load file. Results set order: To export the selected items in the same order as they list in the Results set view. |
| Convert mail, contacts, calendars to |
Select one of the following options to determine what the format to use when exporting email items, as individual files or as aggregated email containers. Individual file options include: Native: To export in the original format to the export folder. EML: To export in MIME message format to the export folder. MSG: To export in Microsoft Outlook MSG format to the export folder. HTML: To export in HTML format. MIME/HTML: To export in MIME/HTML format. MIME/HTML (MHT): To export in MIME/HTML (MHT) format. This is the same output as MIME/HTML but the extension is .mht. This format is supported only for a Nuix Discover Flat File. Aggregated email container options include: MBOX: To export a single email container of all items in MBOX format. PST: To export a single email container of all items as a Microsoft Outlook PST file. NSF: To export a single email container of all items as an IBM Notes NSF file. |
| Field |
Action |
|
|
Notes: A single email container file is created at the root of the Export_Dir\Files folder called Export.xxx, which contains all of the selected email messages. |
| Export Scheme |
Select one of the following options to determine how to export native emails: Leave attachments on emails: To export the parent email with all attachments as a single file and each of the attachments as separate files. This allows the entire message to be viewed as a single entity while maintaining the parent-child relationship of the family in the Legal Export numbering scheme. Separate attachments from emails: To export the email and its attachments as separate files. When performing a native review, this ensures that each item can be viewed as a unique item, while the Legal Export numbering scheme maintains the parent-child relationship for the entire family of documents. |
Other setting sections
|
|
Settings' type |
Field |
Action |
| 1 |
Destination |
Export Directory |
Define the root path to where you want to export the data. The Save dialog defaults to the previously defined location. Note: Prior to performing a legal export, ensure that the target file system has sufficient disk space for the export. |
| 2 |
Native File Export |
Generate natives |
Select to populate the Nuix Workstation binary store with the native file of the selected items during the export. It can be used to reload the binary store if it was populated when the case was created, or to cache files that are likely to be launched in the native format during a review (Excels, PowerPoints and so on). It is not selected by default. |
| 3 |
Printed Image Export |
Generate |
Select one of the following options: Regenerate printed images: (disabled by default) Select to push and replace all PDFs in the Nuix PDF print store with new PDFs generated by Nuix Workstation. If you have imported custom PDFs into your case or if you are using a different Imaging Profile to when the printed image was first created, this option replaces them. Do not export natives of slip-sheet items: Select to prevent natives of slip-sheet items from being exported. |
| Imaging Profile |
Select a customized Imaging Profile from the list. Click Configure to manage the profile through Global options. For more details, see Add an Imaging Profile in Configure profiles used for repetitive processes. |
||
| Show pre-export summary |
Select to view a summary of identified and tagged items. |
Load File Settings tab's details
Load files contain data about the selected documents you export in a format that can then be imported into legal review software, such as Nuix Discover, Relativity, or Summation. A load file includes a generated Document ID (Control Number), relationship fields, such as parent Document IDs, and depending on the load file types, the paths for the native and image types you specified on the Numbering and Files tab. It may also include any metadata columns from the Metadata Export Profile you use.
To create the load file, on the Load File Setting options tab of the Legal Export dialog, complete details in the following sections (where you complete the common details needed for all load file types and, as required, those that are particular to particular load files):
Load File Setting options
| Common Settings |
Action |
| Loadfile encoding |
Set the document encoding mechanism to use when creating the load file (*.dat). The default is ISO-8859-1, the most commonly used encoding. It uses 8-bit single-byte coded graphic character sets -= Part 1: Latin alphabet. The next most commonly used encoding is UTF-8, which allows Unicode characters to be exported as part of the load file. Nuix Workstation is fully Unicode-compliant so you can export a *.dat file with any encoding. |
| File path separators |
Define the character to be used to separate directory names in a file path. (Default is set to \ for DOS and Windows.) |
| Line separators |
Select the line separator from the menu. (Default is set to CR+LF for DOS and Windows.) |
| Load file separation |
Specify how to separate a large load file into multiple smaller files, each with a subset of the items; and select the Metadata Profile (which you can add or edit by through clicking the Manage metadata profiles link. Note: You cannot break families of documents across load files of any load file type. |
| Common Settings |
Action |
| Metadata profile |
Select to use a Metadata Profile, (the default, one you created, or the Nuix Discover Metadata Profile - see the following fields for details). Click the Edit Metadata Profiles link to make changes to an existing Metadata Profile you want to use. |
Additional options for Nuix Discover flat files
| Option |
Action |
| Metadata profile |
Select to use the built-in Discover Metadata Profile to produce a load file with fields matching Nuix Discover fields and help map the fields when setting up the Import Job in Nuix Discover. |
| Multi-value field separator |
Leave the default set to semi-colon, or select a comma as this separator. |
| Address separators |
Leave the default set to semi-colon, or select a comma to separate message addresses to produce a suitable load file for importing into Nuix Discover. |
| File output |
Select the Compressed file option to zip the output file. |
Additional options for Ringtail (MDB) files
| Option |
Action |
| Export to |
Select one of these versions to create its full database and other documents: Ringtail CaseBook 6 Ringtail Legal 2005 (default) Then in the Other Settings section: Leave Inherit document dates selected by default (to apply the email communications date to all descendant (child) items). Remove commas from number fields on export. Use direct parent for host reference. Use document ID for page label. Include native page counts for TIFF in num_pages. |
| Map Export Extras |
To select the category for all Nuix Workstation metadata fields listed in the Ringtail (Microsoft Access) database, click the Category field of the metadata you want to modify. (Disabled by default.) |
| Multi-value field separator |
Displays a comma (,) by default. To load and save the Ringtail mapping file, click Load/Save and specify the path. |
Additional option for EDRM files
| Option |
Action |
| Export to on the EDRM Load File Settings tab |
Select EDRM version 1.01, 1.1, or 1.2 to export in the EDRM legal XML format you require. Visit the EDRM website for more information on these formats. |
Numbering and Files tab's details
The Numbering and Files tab In the Legal Export dialog, allows you to set:
Naming conventions for different load file types. See the following Define file names per file type.
Document numbering in load files using one of the following:
Simple sequential numbering for Concordance, Summation, Ipro, and Discovery Radar.
A Granular numbering scheme for Ringtail (MDB) and Discover Flat File formats.
Numbering Type and Export Type compatibility
When creating a load file, the following are compatibility rules that must exist between the numbering settings and export output settings you select:
Ringtail or Discover Flat File export types require Advanced numbering.
All other export types can use standard numbering.
You must disable export output settings, as the formatted numbering does not work with any export type.
When you click OK to save the profile, this triggers a check on the compatibility of the numbering type and export type. If this check fails, an error message appears.